Tom Grundy's project 512 Page
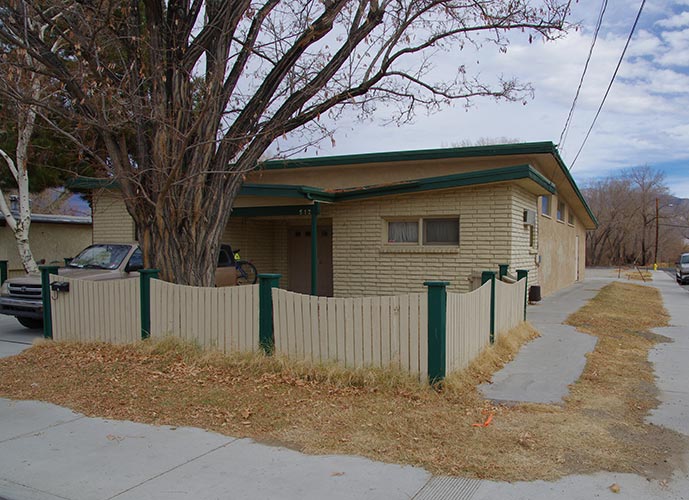
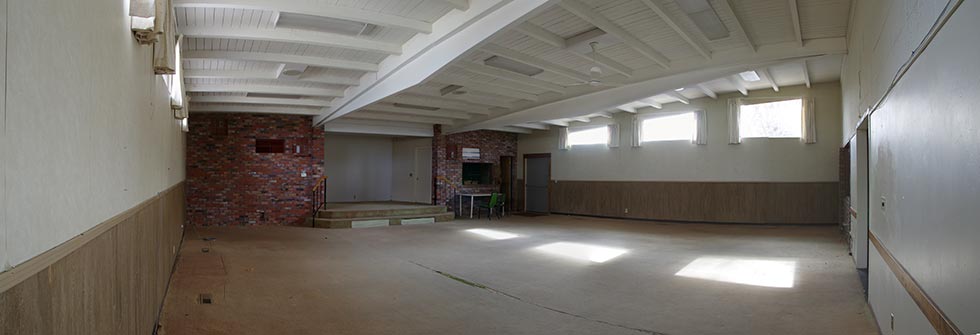
Project 512 is my property in Bishop California the address is 512 (sorry, I couldn't climb any harder than 5.12). It is a work in progress, but serious progress has been made - so here are some pictures. The property was originally a Jehovah's Witness church, and then owned by a non-profit which used it as an office and for storage. Now it is the Church of Grundy. It is mainly one huge room with a stage at one end and an office and a bathroom. It needs a kitchen and a shower among other things. I have lots of plans, but it will take a while to complete. Still, it is quite exciting and daunting. It is within easy walking distance of "downtown" Bishop, the irrigation canal east of town, and the city park. I can see the Sierras from some of the windows and with a bit of effort the white mountains the other direction.
Phase I : locate
completed August 2012
Phase II : acquisition
There were many delays and hiccups along the road to acquisition. Among other things there had to be a meeting of the board to answer any important issues (like if they would accept an offer), so that slowed things down a bit. Then the city inspector thought that the building was too close to the property line for residential use. This would mean I would have to get a Conditional Use Permit (CUP). The first step towards this was to get the property surveyed - which revealed that it wasn't actually too close (The building next door is another story). Because the CUP process is long and involved the closing date was set to allow that, so there was a lot of waiting, but eventually the big day came.
completed Dec 5, 2012
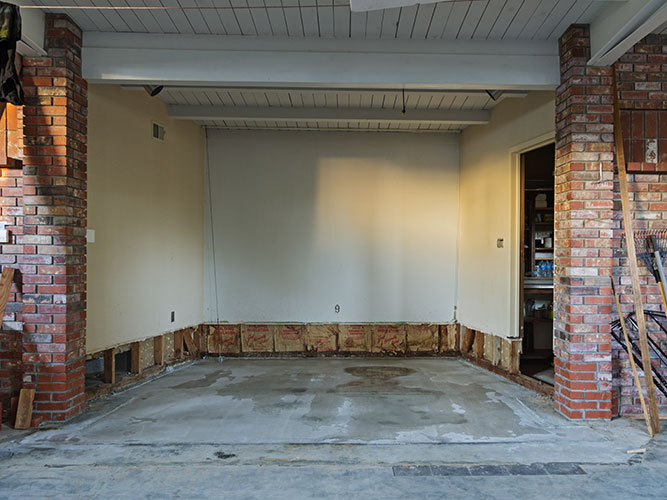
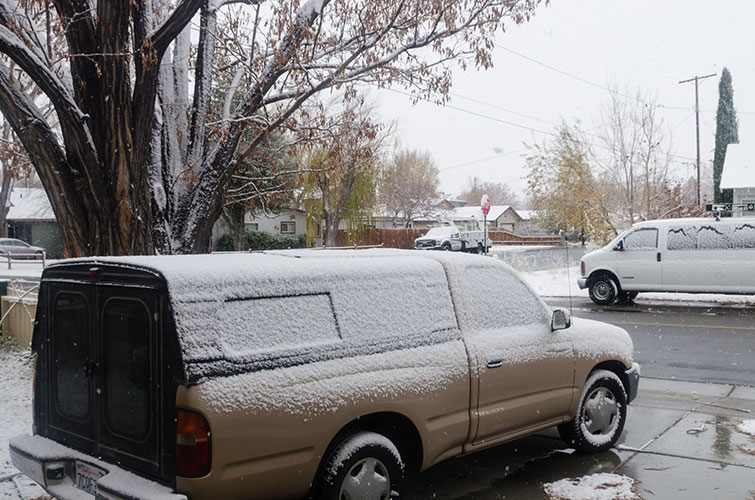
Out front
 |
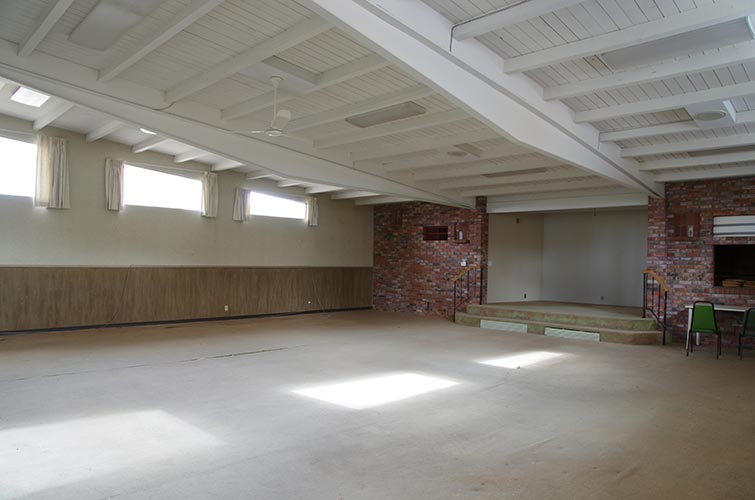
main room and stage
 |
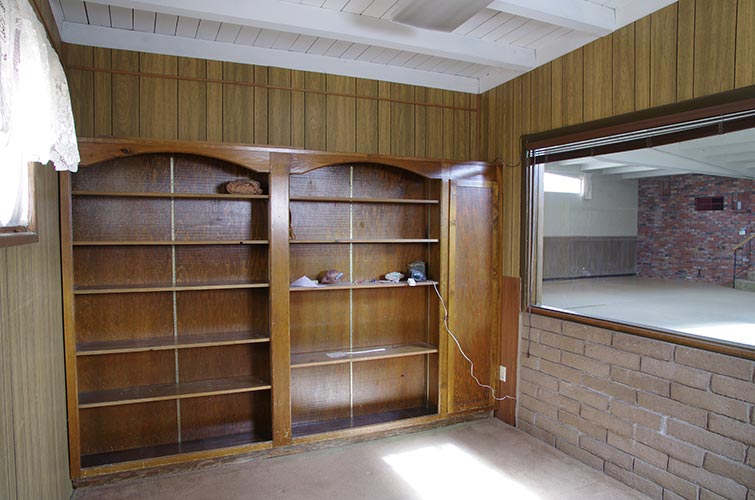
office
 |
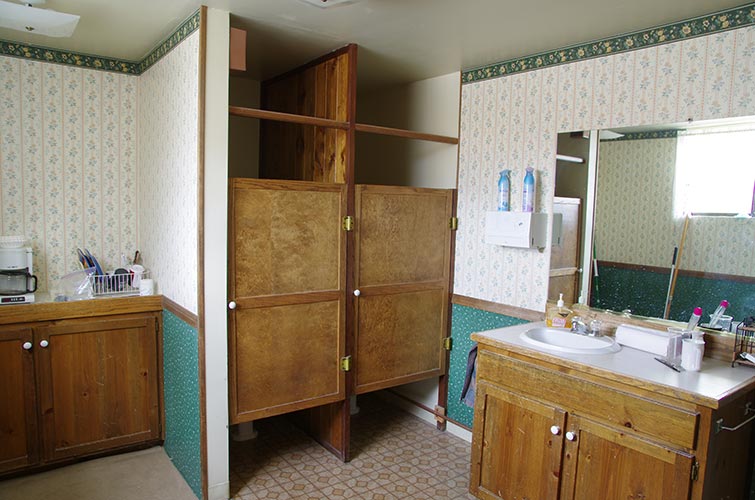
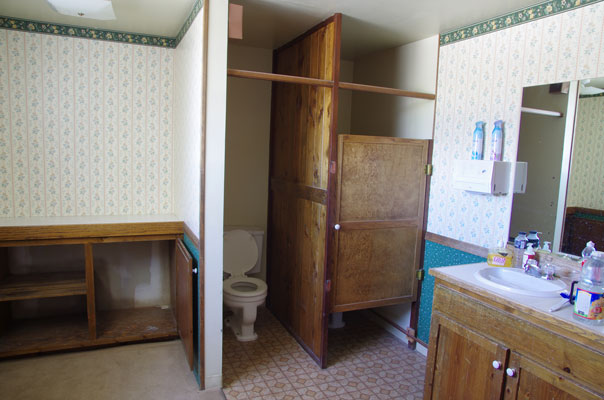
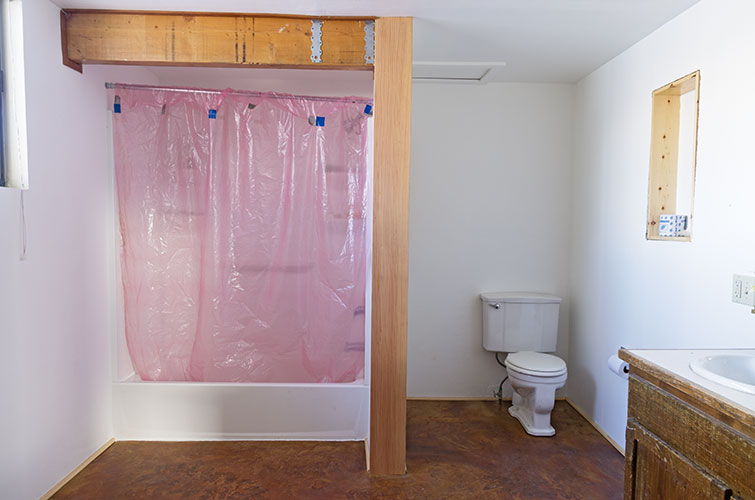
bathroom
 |
main room panorama - the right wall is taller, the sun is coming in from the south.
 |
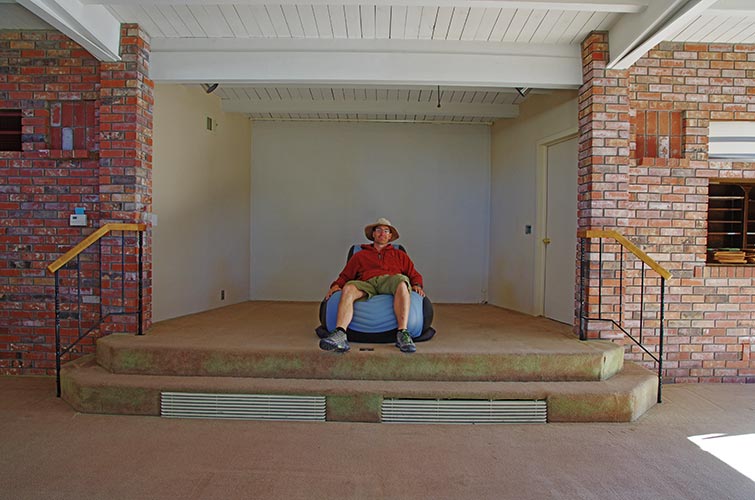
On the throne
 |
I also get to enjoy some of the "joys" of ownership - like cleaning gutters, raking leaves, and covering the evaporative cooler. I also got a few new plants that with any luck will root in nicely. Hopefully I can start growing fresh veggies at some point.
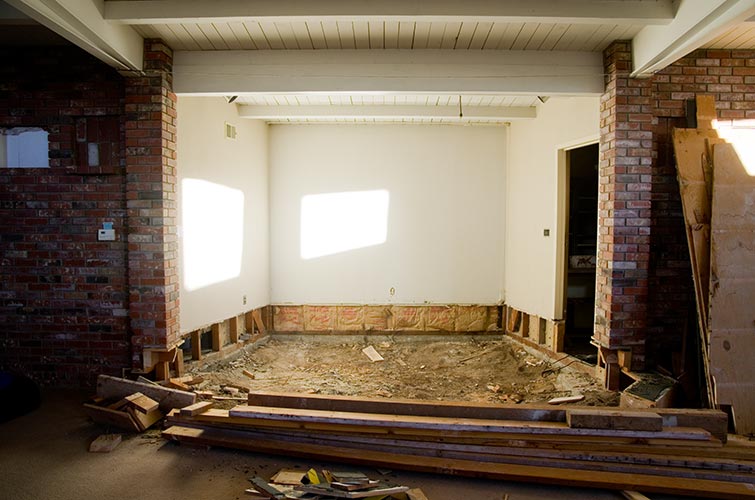
Phase III, renovation/construction
About to begin - gulp.
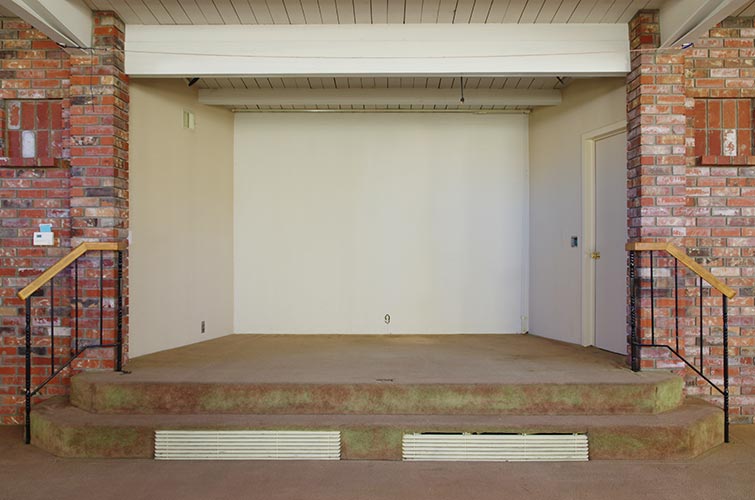
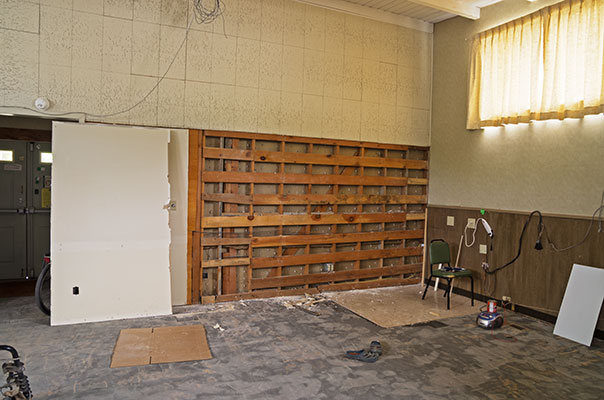
stage - now you see it
 |
stage - half gone - a lot of work
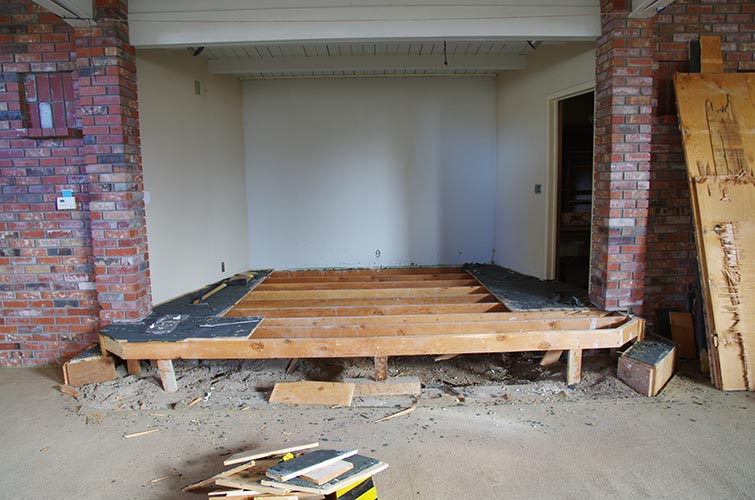 |
stage all gone
 |
Next up - I get to play with concrete. Actually I get to dig and insulate and level and compact and reinforce and then play with concrete.
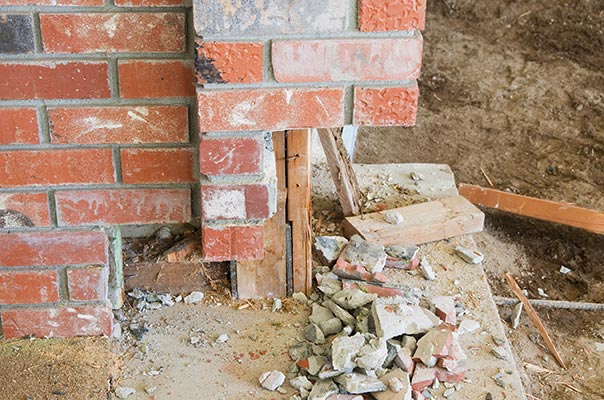
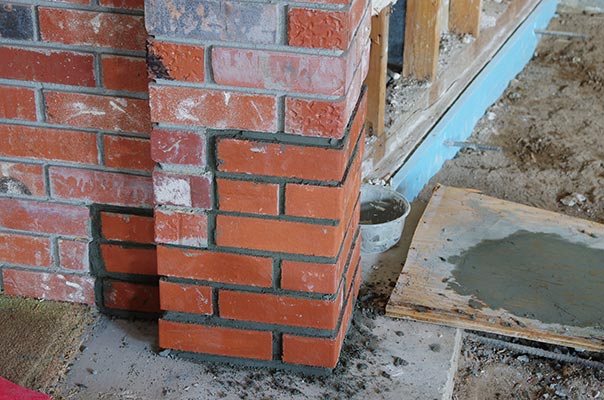
Jan 16, 2013, rather than play with concrete, I did some brickwork where the brick pillars did not extend all the way to the floor. I had to use some brute force engineering to get the last bits of the stage out from under it and then some more to get the partial brick course and extra mortar out of the way. Then I played mason... While not a great job, it did fill in the hole.
first I had to remove the wood and partial brick course
 |
Left side - done. Note blue foam insulation
 |
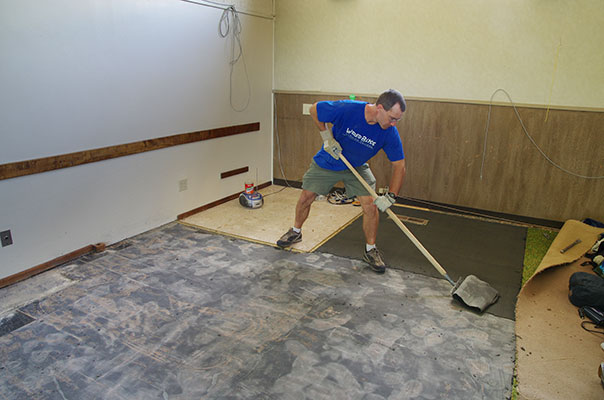
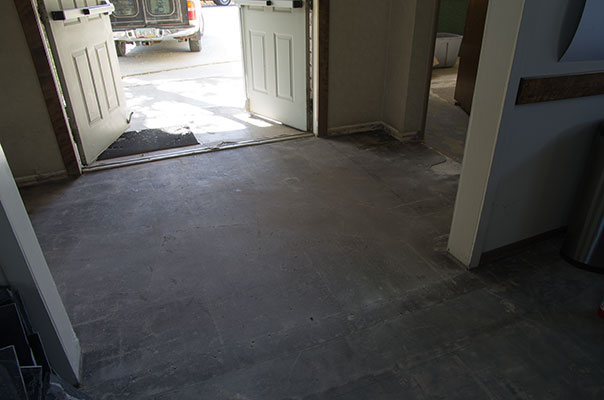
April 28, 2013. After being away for over 2 months it is time to get back to work... Among other things I pulled up the carpet, and the carpet under it. Unfortunately that carpet was glued down and the rubber foam backing ripped apart requiring laborious scraping. I also had to make a number of trips to the local dump to dispose of carpet rolls and other debris.
Scraping up the rubber backing
 |
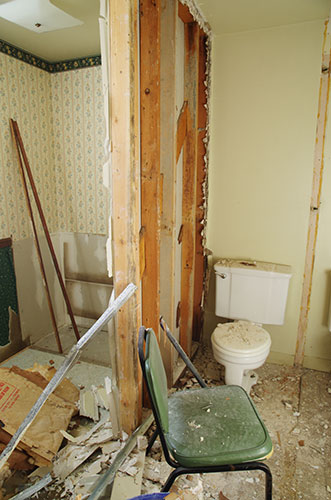
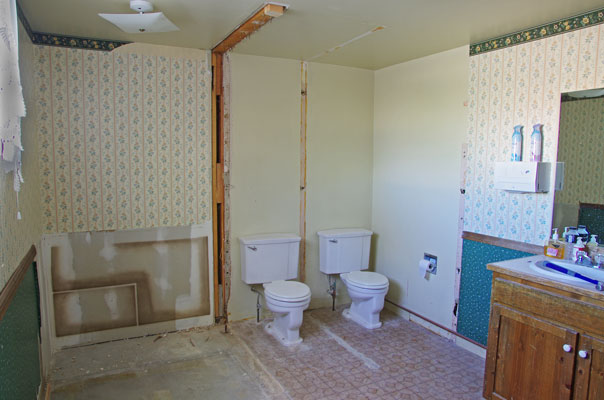
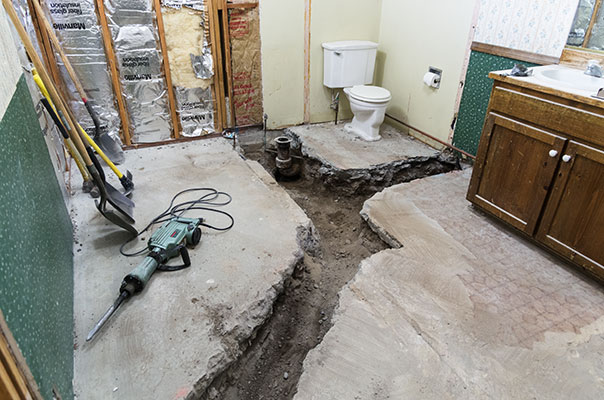
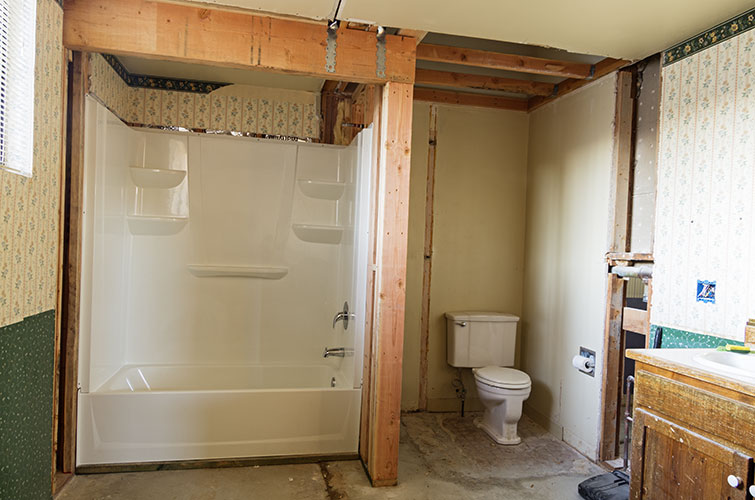
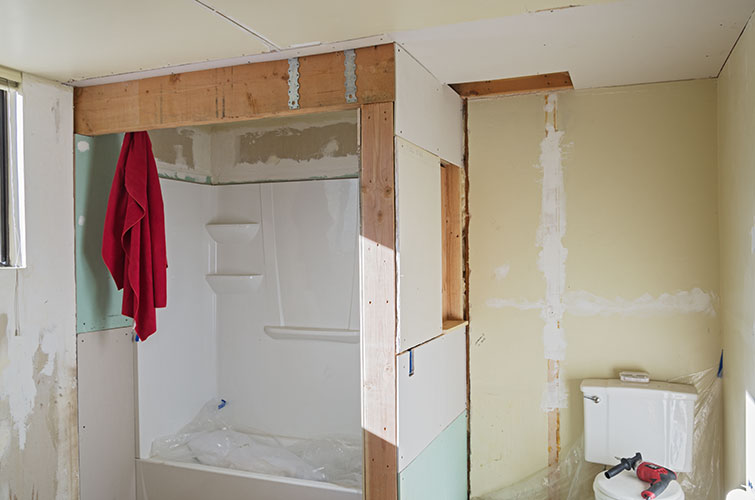
The other project is the bathroom, I took out the built in cabinet and wall as well at the toilet dividers. This was a mess. A sledge hammer can really cause some damage.
Bathroom - at the start
 |
Bathroom - making a mess
 |
Bathroom - mostly ripped out
 |
I was sad to remove the one bit of flooring I actually liked - some slate in the front entry. Maybe I can re-use the pieces somewhere in the future.
Entry - partway into the destruction
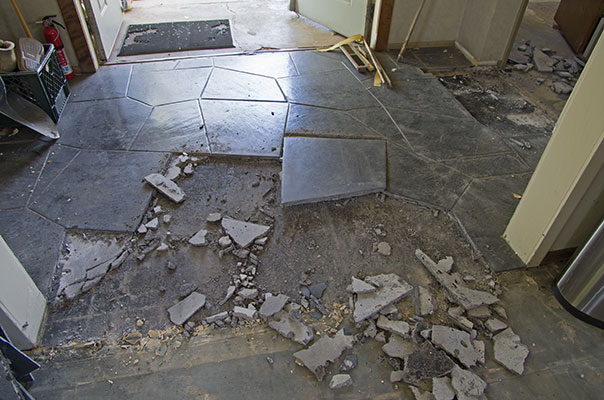 |
Entry - slate all gone
 |
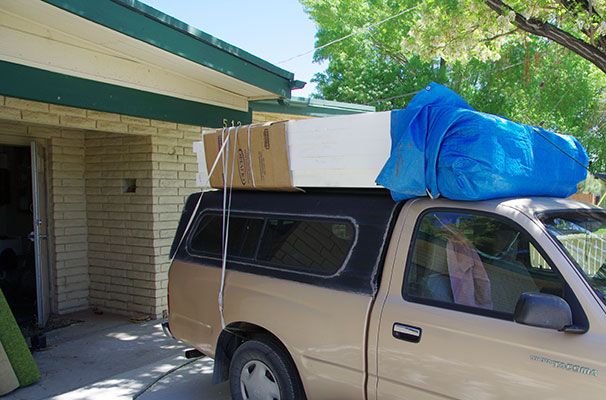
I also have been acquiring and stockpiling various things I will need for this project. Here is a load of styrofoam strapped to the top of the truck.
Styrofoam insulation. Note the locust tree flowering - and smelling pretty nice.
 |
During this time I also got the construction permit. This took a bunch of trips to the city with various plots and plans and $, but finally I got it.
July 16, 2013 I took another few months off to go east again. While I was gone there were some issues with the watering system I had set up, but most of the plants survived.
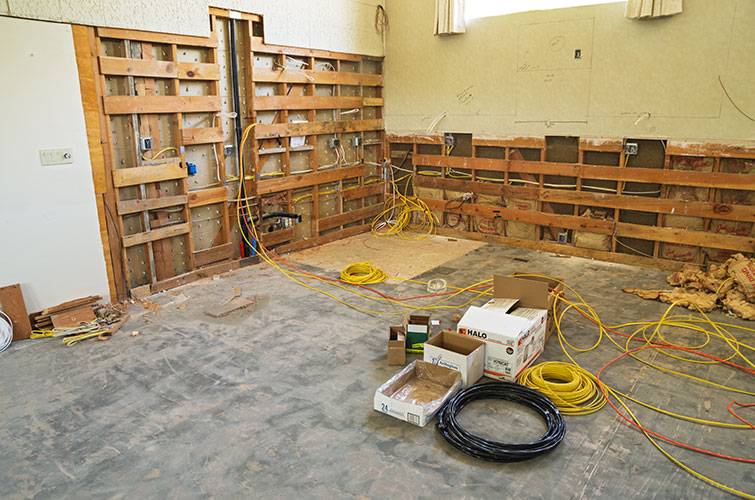
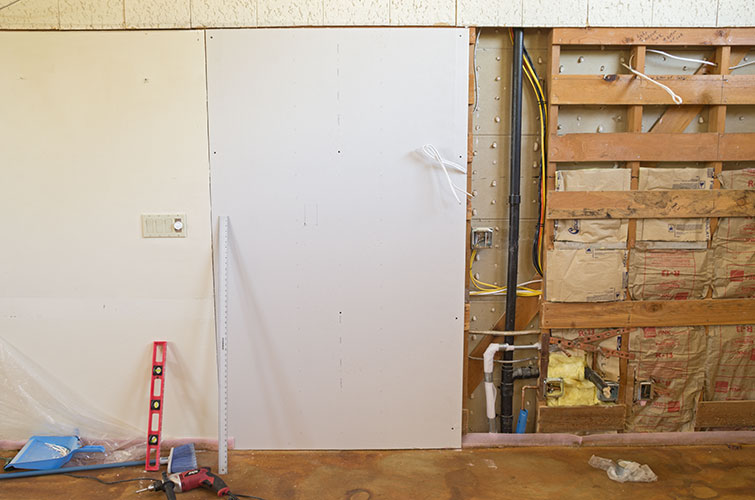
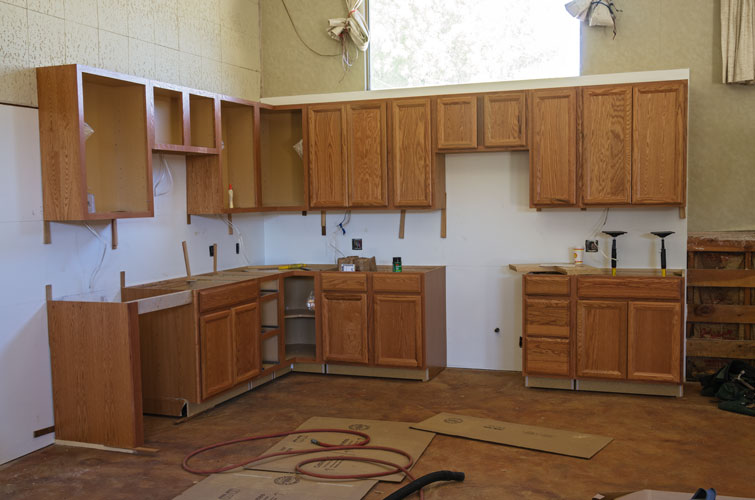
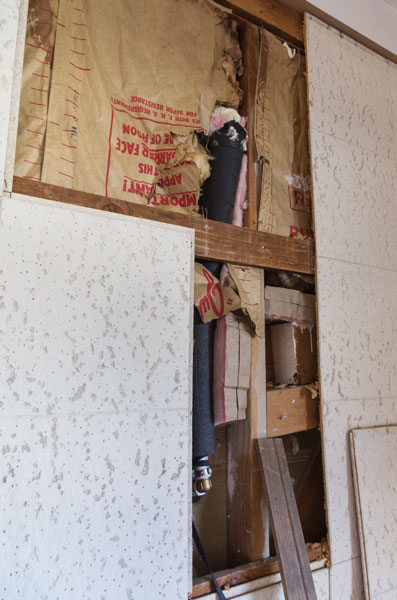
Finally in July things started moving again. I removed a bunch of the sheetrock where things would be done and discovered why the stud finder wasn't working particularly well. Then the contract work started - busting through the floor for plumbing and so on. They did a bunch of the work, but after they left I continued with what they started.
removing drywall for the kitchen
 |
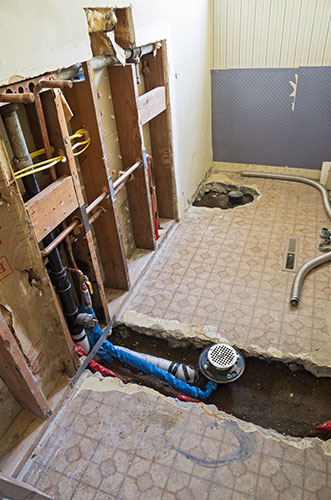
trenches in the bathroom floor for plumbing
 |
Exposed plumbing in the to be utility room
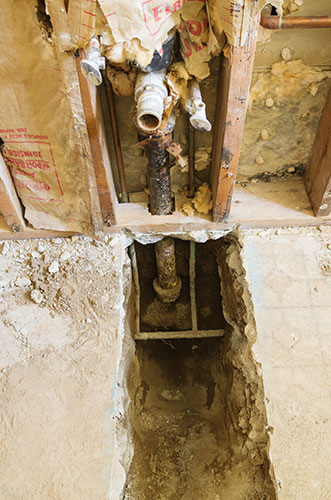 |
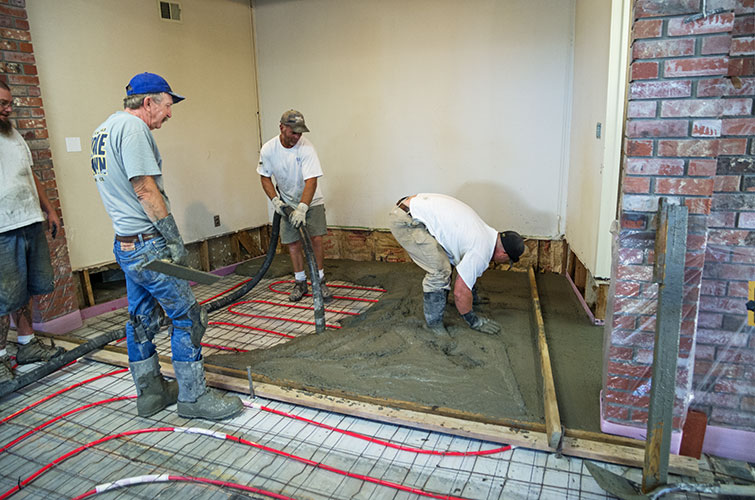
8-7-2013 there has been more progress, concrete, and plumbing and some electric and so on. The 2 biggest obvious changes are the concrete in the trenches in the floor and in the hole where the stage was and the tub is in with a bunch of reinforcing where the old wall used to be - it looks like I'll have a place to put a hangboard. There are a bunch of little jobs to be done, but the big things are putting down the hydronic floor and drywall.
utility room - ready for concrete
 |
utility room - with fresh concrete
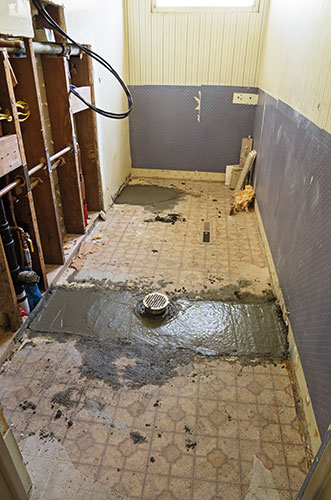 |
Stage hole ready for concrete
 |
screeding the concrete
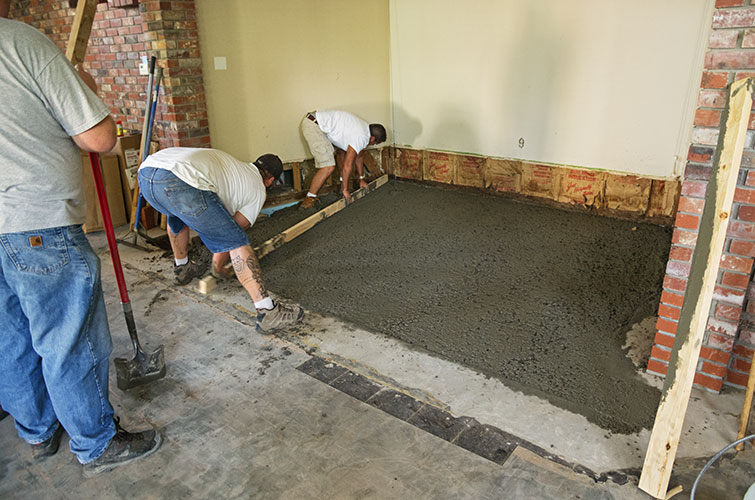 |
the stage area with new concrete - with an anchor in the back left.
 |
the kitchen area - mid electrical work
 |
the new bathtub
 |
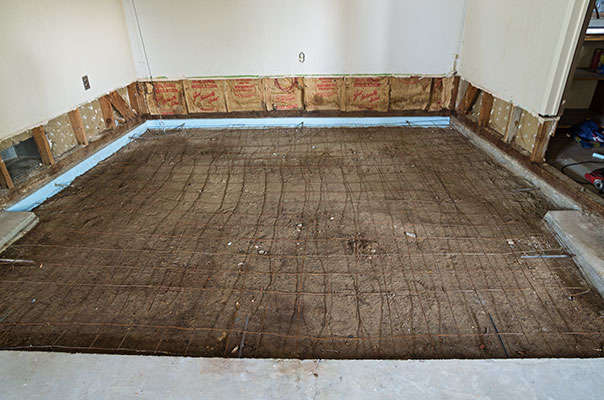
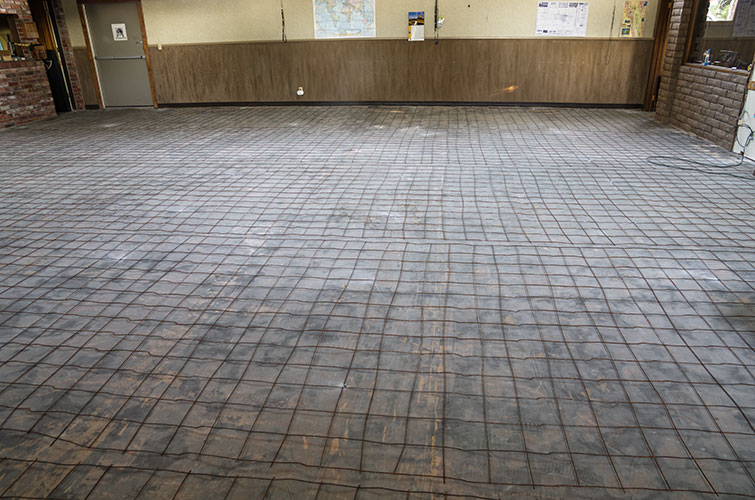
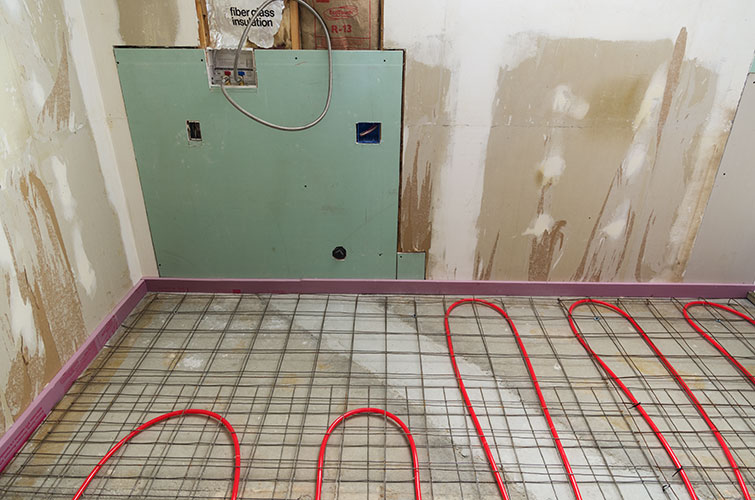
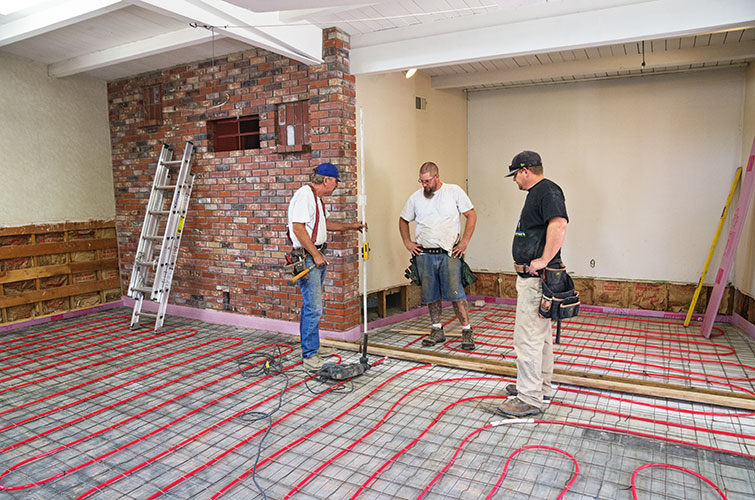
8/13/2013 I have been preparing the floor for putting down the hydronic pex pipes. Mostly this has involved putting down wire mesh everywhere, then flattening it and fastening it down. This is a real pain, especially when the mesh is being recalcitrant or when the drill hits a chunk of granite in the concrete. The smaller rooms also involved cutting the mesh to size and trying to wrangle it into place. Once I get some info on the concrete control joints I can start putting down the pipe.
mesh on the floor
 |
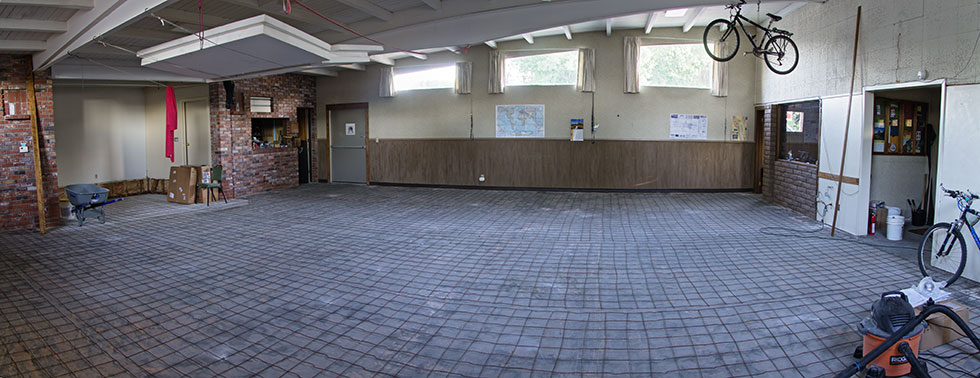
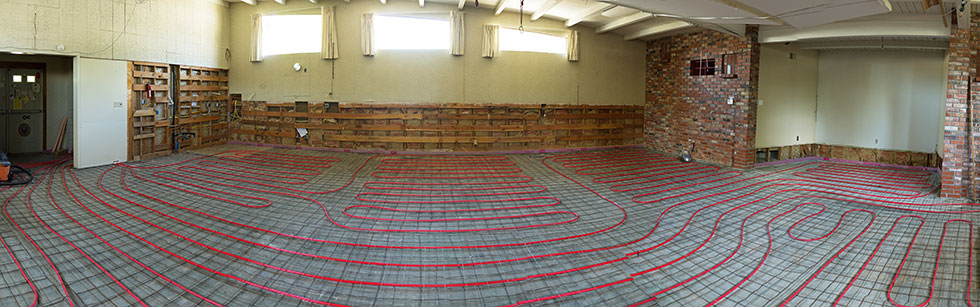
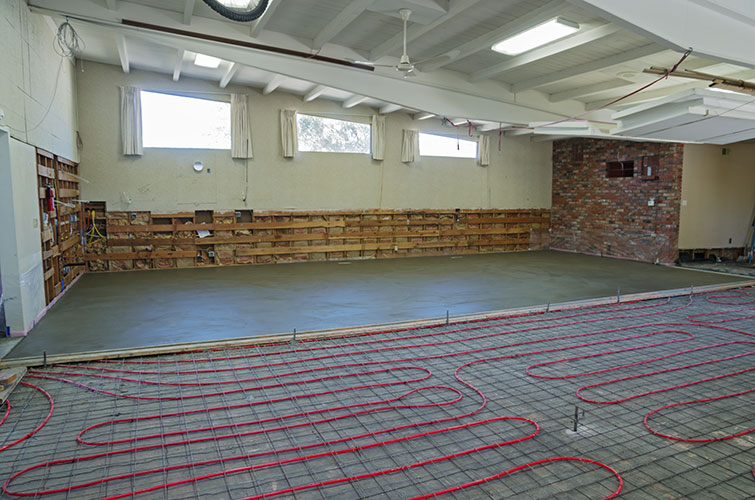
main room panorama - with mesh on the floor
 |
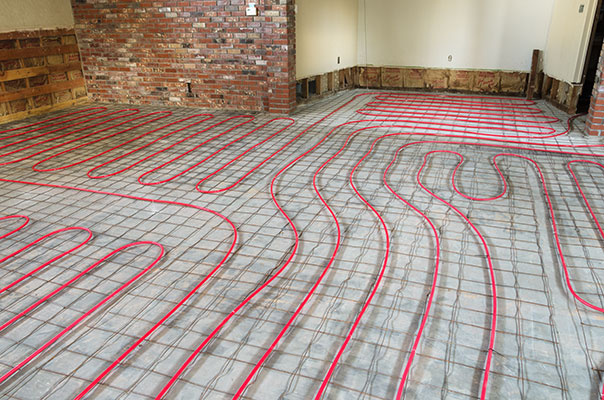
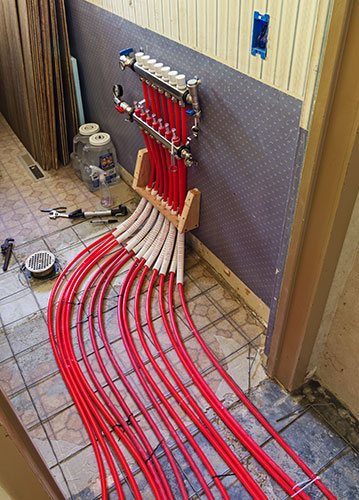
8/26/2013 Once the mesh was down, the next thing was to put down the 1/2 inch pex (cross-linked polyethylene I think) piping in a hopefully logical pattern all over the floor to distribute heat from the future solar hot water system. This was done in multiple loops all connected to a manifold that will allow me to adjust the flow through particular loops in case part of the floor is too hot or too cold. The pex was fastened down with little plastic straps (that I thought were zip ties when I ordered them) and zip ties. In some places it was happy to stay where I wanted it, in others it had a mind of it's own.
sticking down the pex - note use of gear ties
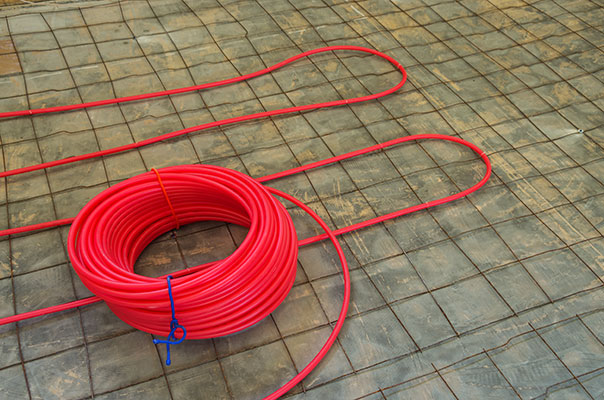 |
pex on the floor
 |
manifold area - a real mess of pipes
 |
Following the pex tubing I worked on cutting 3 inch foam insulation strips to go around the outside of the slab where it coincided with the exterior walls. For the interior walls I am using a thinner material - sill seal since those don't need the insulation. The foam was glued into place. I had to put up some drywall where it was missing before the foam, but before the drywall, I needed to insulate the walls - you can see how this might take a bit of time. I also pulled off the rest of the plywood along the lower boundary of the main room so that the foam would be a little deeper into the wall and I will cut the plywood before I put it back so part of it won't be buried under the concrete of the new floor. I also took off the wallpaper in the bathroom since it would get in the way of the drywall patching.
The W/D area with new drywall - no need to heat the floor under this area
 |
The other big project has been putting another layer of mesh down on top of the pex. This will hopefully limit the size and extent and most importantly the movement of any cracks that form in the floor. I finished the roll I was working on and had to go for more. For the most part it was easier to flatten this layer because I wasn't quite as concerned about it as long as it didn't go over about 2.5 inches from the floor and I could also just fasten it down to the wire that is already on the floor instead of having to drill an anchor into the concrete floor. Hopefully with the completion of this it will be close to time to pour the floor.
main room panorama - north wall with pex on the floor and foam at the bottom and a second layer of mesh
 |
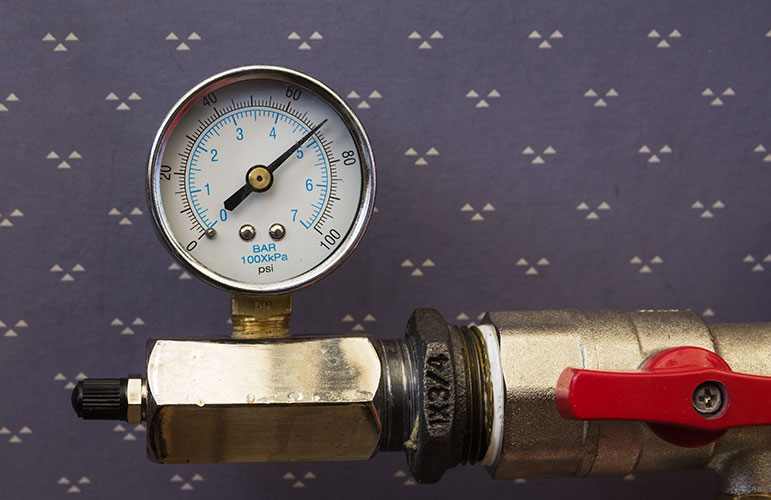
9/07/2013 I pressure tested the pex system at 70 psi. The only thing that leaked I could find was a very slow leak in one of the manifold joints that I didn't have a big enough wrench to crank tight. Once things were ready for the concrete guys to put in the screed rails and so on and they were free, it was Labor day weekend, so I headed out into the mountains... Then I cleaned up and prepped on Monday and Tuesday the 3rd they set up for the pour, which couldn't happen 'til Thursday because the pump truck was busy.
pex system at 70 psi. Luckily I didn't have to do this with the bicycle hand pump
 |
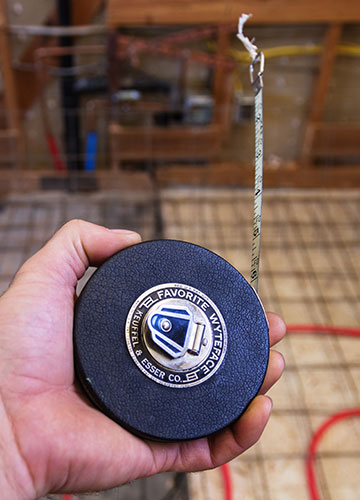
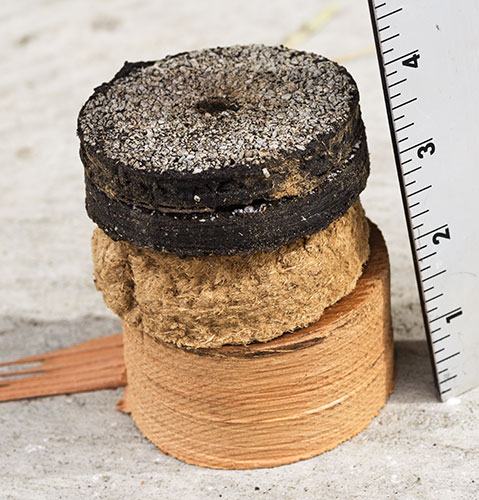
I like being able to use my grandpa's old 50 ft tape measure - it has been handy too
 |
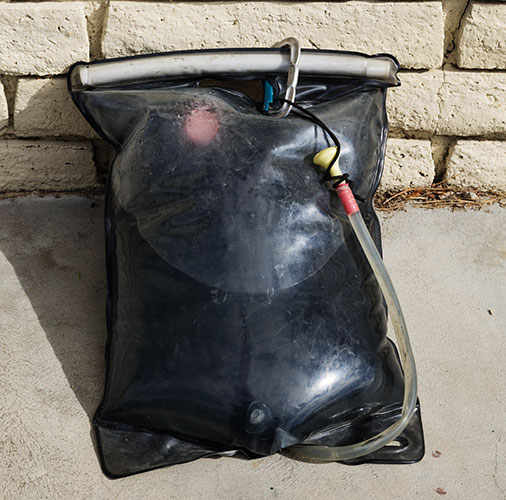
since I have a tub but no shower or hot water, I use this modern solar system. Unfortunately the spray nozzle and fill hole both leak so have to be kept above the water level.
 |
some head scratching was required to decide how to deal with the not really level existing floor
 |
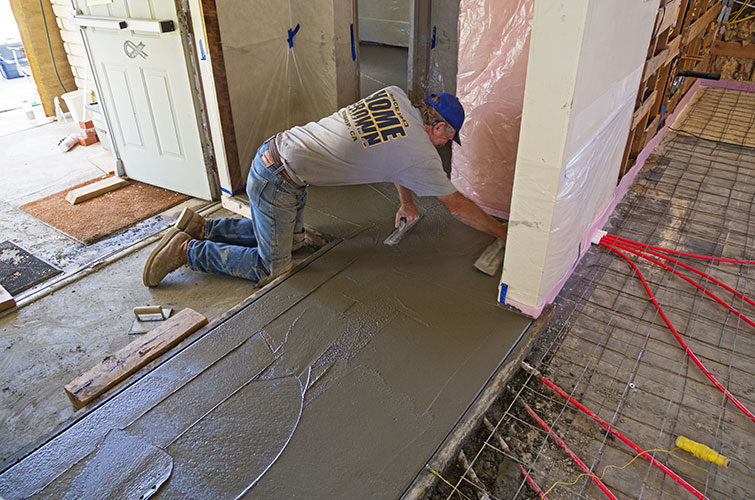
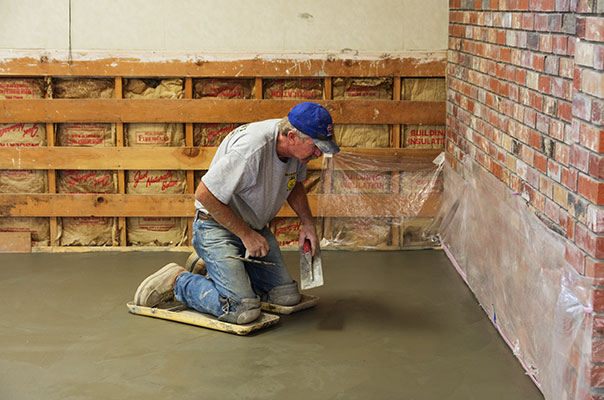
Finally on Thursday we pumped concrete into the small rooms and hallways and the stage area. Then it took a long time for it to dry enough for finishing because no water soaked downwards and indoors there wasn't solar drying or much ventilation. I did have all the windows and doors that could open open and the swamp cooler fan blowing on high all day. Still it took a while. Once they were finished finishing the concrete we removed the forms and finished setting up for the next day - the north half of the main room.
concrete and the pump truck - this was actually the second day - you can see the paving "stones" I made on day 1 on the rt with more under the tarp
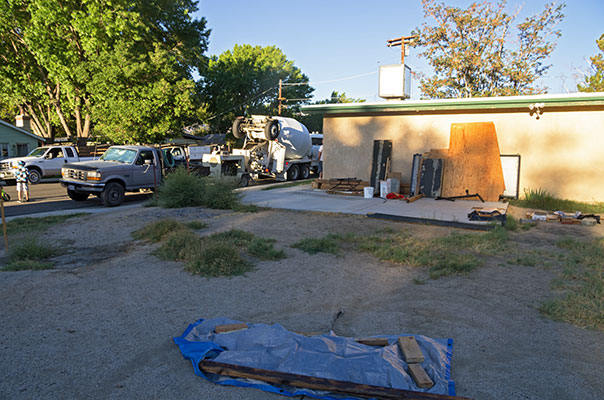 |
placing the concrete
 |
the first trowel pass in the entryway
 |
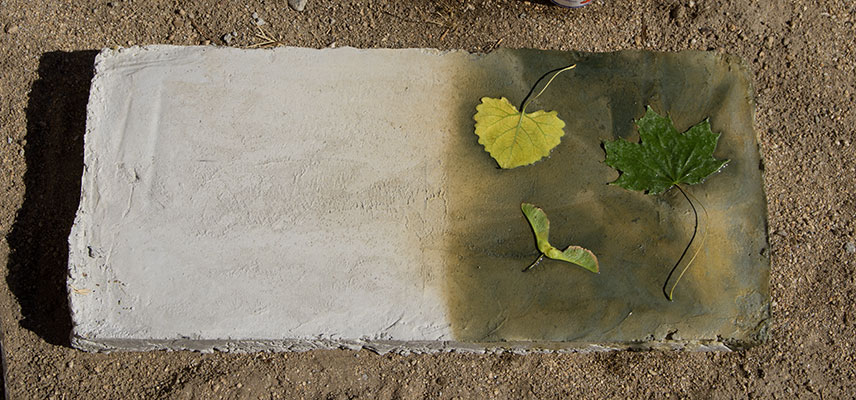
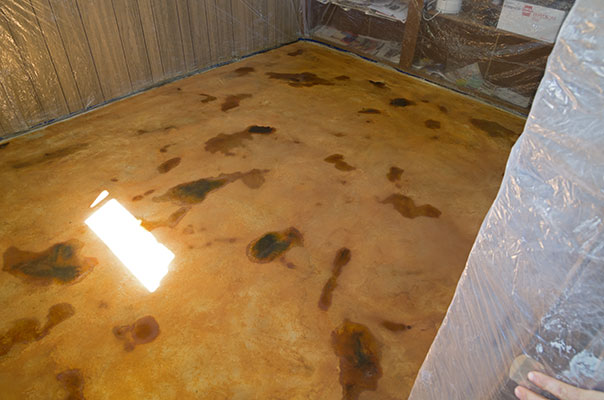
That night after a bit more curing I wetted and put plastic down on all the fresh concrete to help keep it moist and extend the curing time. Because I had heard that the plastic left an odd pattern on the floor when you stain it I put down a bunch of willow branches under the plastic. I originally intended to use straw for this, but I couldn't get any. I don't know how this will work. Maybe I'll have odd patterns from the plastic and the willow. Speaking of staining. I am planning on staining with Iron (II) sulfate. I got a big bag of it from a nursery here and experimented a bit with a stepping "stone" I made when we poured the plumbing trenches and stage hole. I stuck some leaves down to see what kind of pattern they would leave (a darker outline at the perimeter of where the leaves touched the concrete). I think I'll put down a number of coats to get a darker and more even color. I also have read that coffee helps make it a bit more brown and rich colored, so I need to see if I can get leftovers from the local coffee shops. My goal is a little more brown and a little darker than the test block below.
staining test part 1 - I just sprayed the FeSo4 on the right half
 |
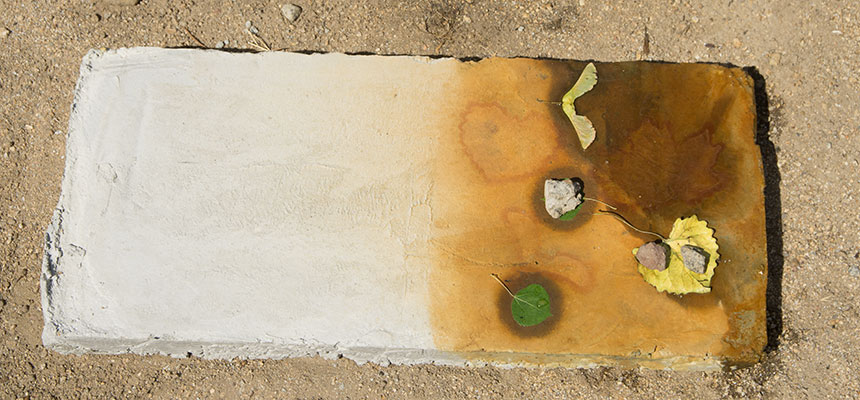
staining test part 2 - the rusty brown part is dry from the second spray, the darker area is still wet
 |
On Friday the 6th we did another pour. This one was a bit easier because it was just one huge flat rectangular expanse. It still took a long time to dry and they decided to come back Saturday to remove the form boards and set up for the last pour. Meanwhile I have been trying to keep the fresh concrete damp to continue the curing. This is supposed to result in a more solid surface as well as less surface cracking and a harder finished product. I hope it works.
Bill makes the finishing look easy. Here he is making it all flat.
 |
the second day's concrete
 |
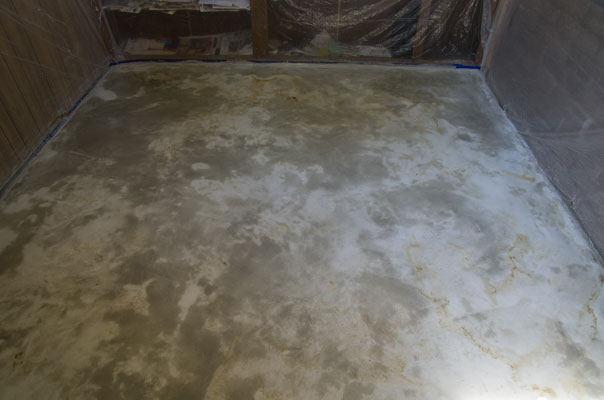
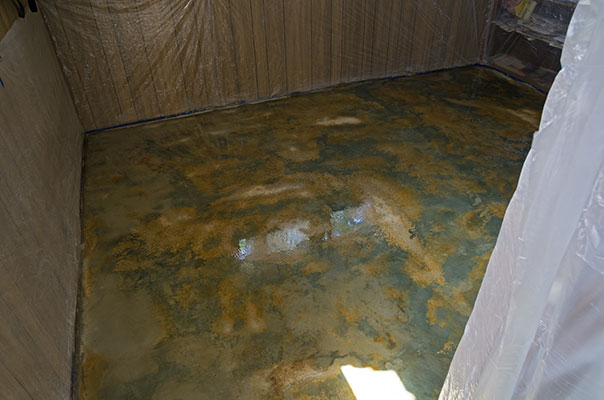
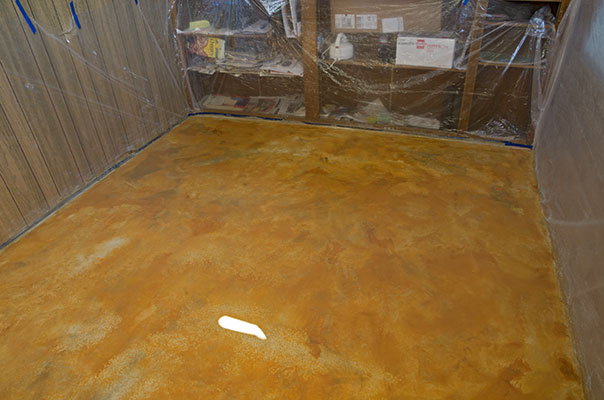
9-13-13 The concrete is all down and cured as best as I could. Now I have been staining. For stain I have been using Iron (II) Sulfate - I got a big bag at a nursery (it is used as a soil amendment to provide iron and to prevent yellow leaves). As suggested on the web I have been adding coffee for a browner color. I have been putting about a quart of powerful reboiled coffee (I got a bucket of grounds from the Black Sheep coffee shop - thanks guys) and a 6 oz yogurt container of FeSo4 powder into my sprayer with as much water as it takes to bring it up to 2 gallons (I strain the coffee and mix the powder in another container to keep the few bits that don't dissolve out of the sprayer). Then I spray it on the floor trying for an even coat but not so much that it puddles up in the low spots (which happens anyway). I have tried putting a few leaves down with it, but mostly it is too much trouble while I am spraying. It is hard to show the color with pictures, it turns very dark when it is wet but then the iron reacts with the concrete and oxidizes and becomes more of a rusty reddish brown when it dries. I have been putting down at least 2 coats to even things out and make it darker. The first coat in the office, gear room, and stage had less coffee in it. Unfortunately I will have to wait a while before I can seal it (because the concrete is still fresh and full of water). I might have to stain it again before I seal it.
the office floor before staining
 |
wet floor after first coat is applied
 |
first coat is dried here
 |
second coat is almost dried here
 |
stage area with 2 coats and the N half with one coat almost dry and S side with no stain
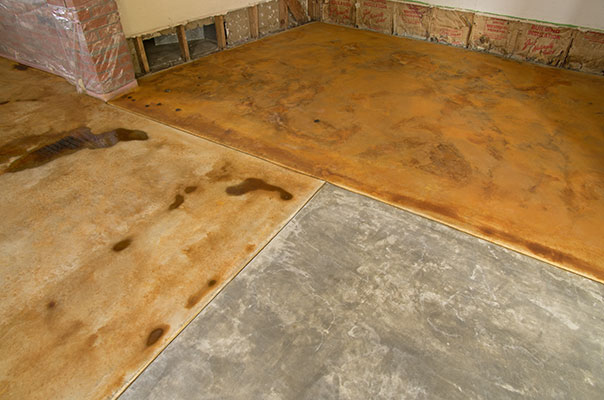 |
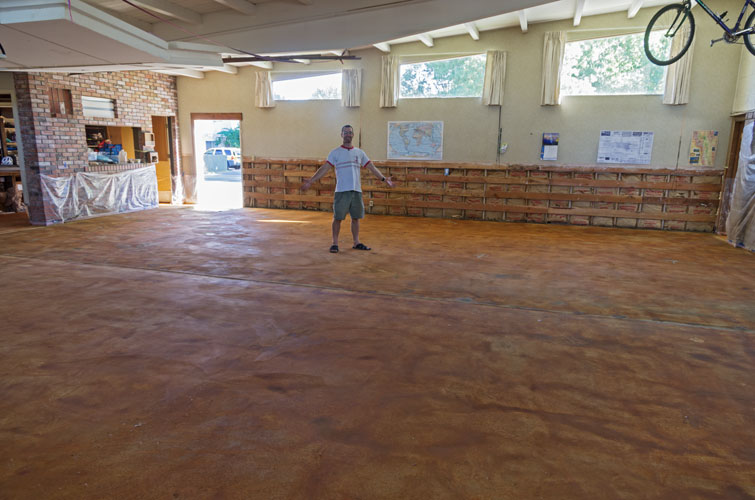
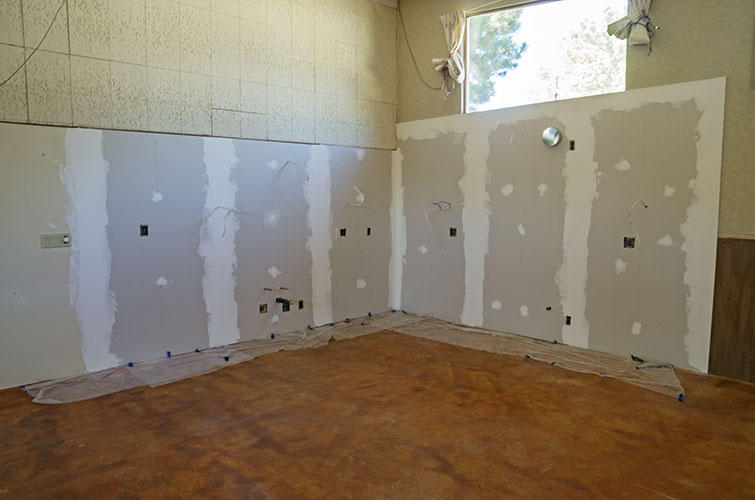
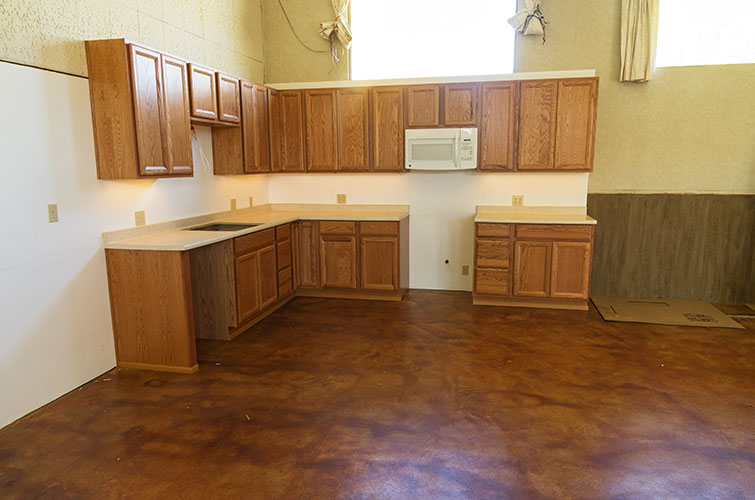
9/25/13 The floor is stained, the color isn't very even, but in general it looks pretty good. For the last section of the floor I used my sister's genius idea of masking with rubber cement to make some fossils and petroglyph designs on the floor. Some of them didn't turn out so well, but others I really like. I need to not dwell on the little messed up parts but enjoy the whole floor. There are a few hairline cracks too, mostly in doorways. This isn't a surprise. As long as they don't get any wider or move that is fine. My latest project has been drywall. I covered the walls where the kitchen will be and also filled up all the holes in the bathroom. Then taping, spackling, etc. and finally painting the parts that will not be covered by cabinets in the kitchen. I also made a few inset shelf areas for the bathroom that fit in between the studs.
the floor - all stained
 |
archaeopteryx "fossil"
 |
rattlesnake "pictograph"
 |
putting drywall up in the kitchen area
 |
drywall up in the kitchen area. The round pipe under the window is the stove vent.
 |
Bathroom drywall pieces and spackling
 |
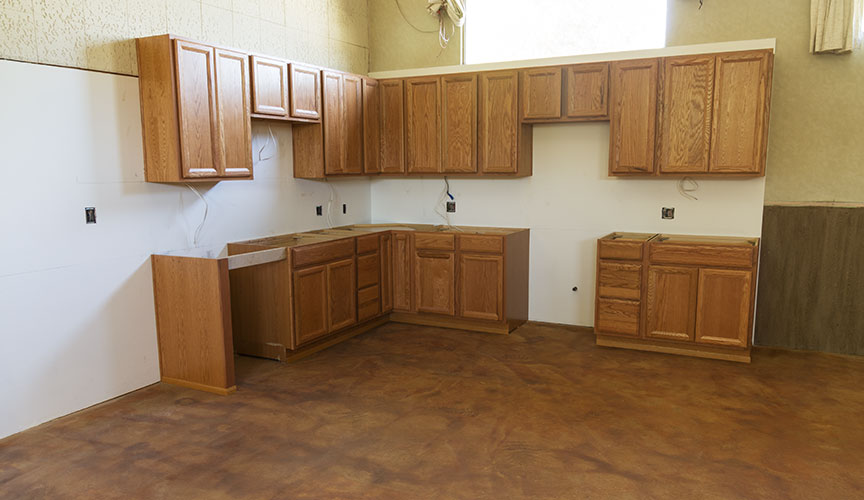
10-03-13 The latest change is cabinets. This comes along with cooler weather applying some pressure to get the solar up and running. Next up is a counter top and sink. Meanwhile the drywall spackling continues in the bathroom and the plywood has been replaced on the S side.
cabinets all set out on the floor
 |
mid installation
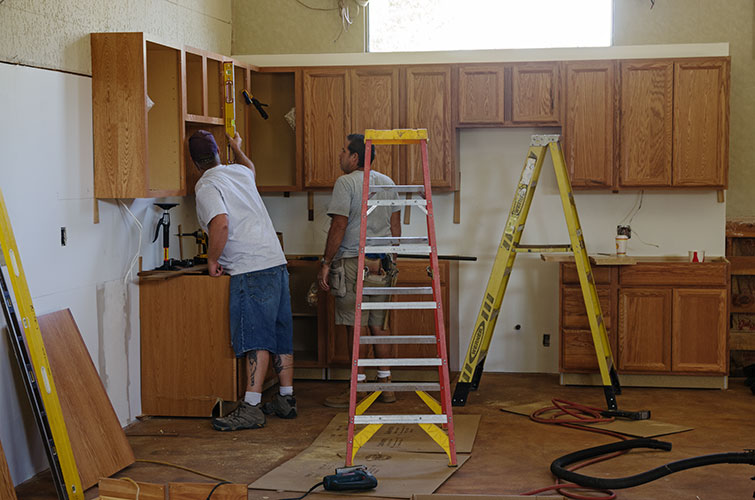 |
another mid installation pic
 |
cabinets all in
 |
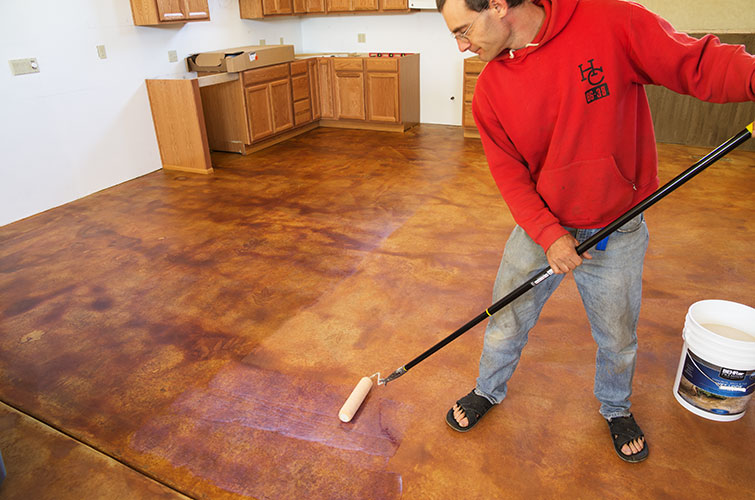
10-31-13 oops it has been a while, and progress has been made. After a fun interlude with Willow I picked up sealer and some other stuff in Reno and got to work on sealing the floor. First I swept and scraped and did some last minute staining of scratches and light spots (at least I tried to). Then I mopped, and then after it dried overnight I vacuumed and sealed - first around the edges with a brush and then everywhere with a roller. For the most part it went well and the results are a nice improvement. There are a few spots that seem a bit cloudy, mostly corresponding to the low places in the concrete where the stain puddled. Still it is a vast improvement as far as how it feels and mostly how it looks. For the last section I had to crack out the floor vents and the anchors I placed in the concrete before sealing - and then I remembered I needed to remove the rubber cement I used for the fossils and petroglyphs. oops, that took a while and left much brighter designs than I expected. You can see some of them in the later pics.
rolling the sealer on the N side
 |
The counters came in and went back out - the backsplash was too high and covered the outlets. oops. Luckily the company that made it had measured it. Also the under counter lights got stuck in. I thought they were going to be LED lights, but they are halogen. I think I'll put in my own LED lights and just use the halogen if I need to perform surgery or something requiring even more light.
I continued work spackling and painting some of the perimeter in the bathroom as well as fixing spots where either I or the workers had made too big of a hole for the outlet plates or the ceiling lights.
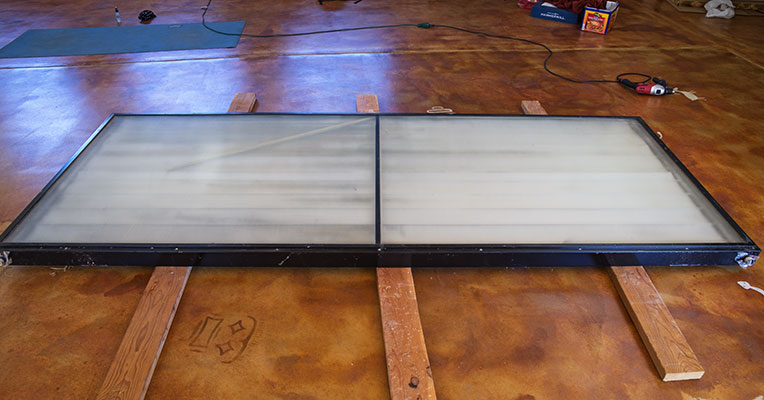
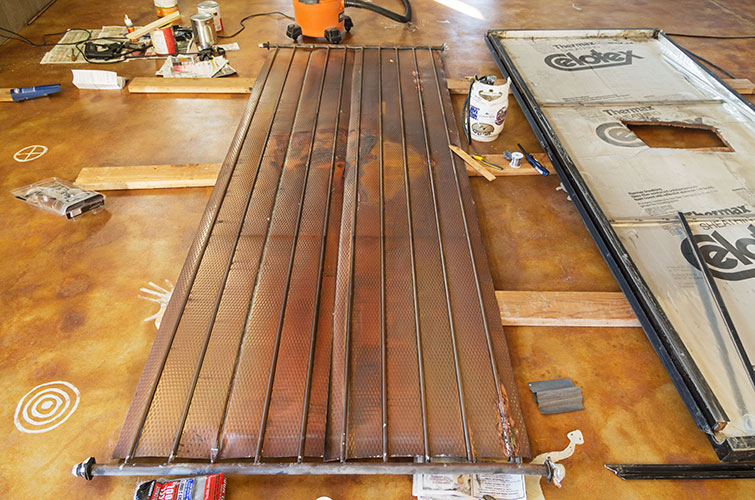
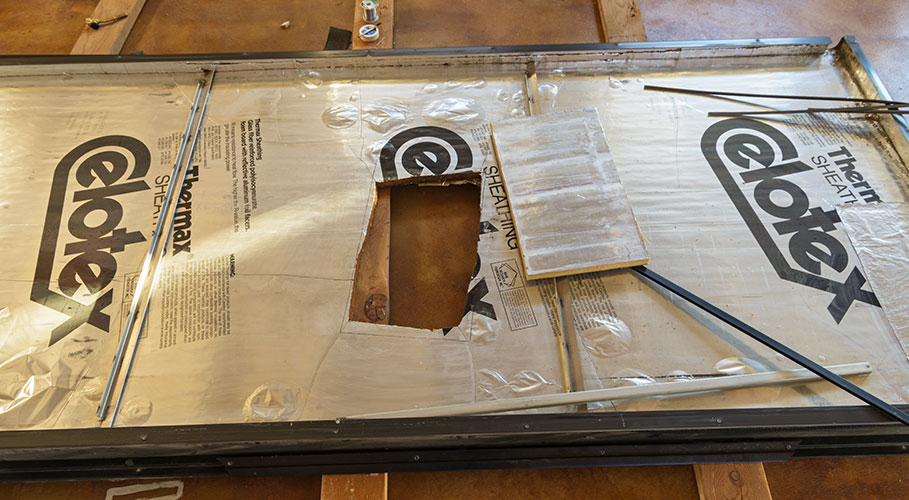
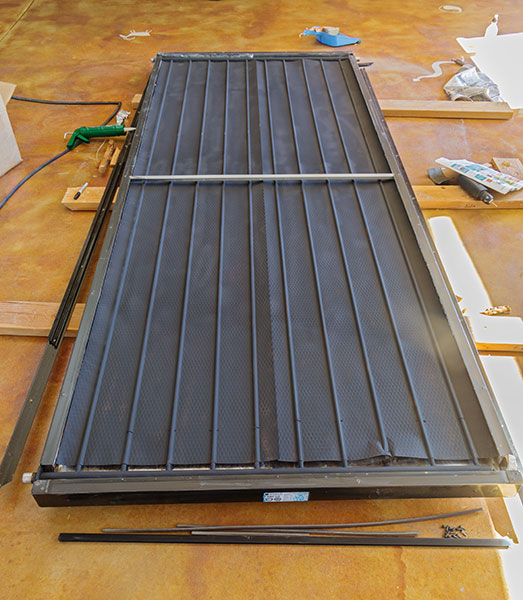
Once the floor was clear I brought in a solar panel and started rehabbing it. This one had suffered a frozen and split pipe in the past and they had cut through the back to cut out and seal that riser tube. The center support had come off and the selective coating was pretty shot. I scrubbed that off and then tried to solder the pipes back to the copper plate where it had come off. I had no luck there despite a number of tries. I ended up wiring it down in a few places and then caulking it in place. Once the selective coating (which was a powdery mess) was removed I painted that side of the collector with black barbecue paint. Of course the wind picked up when I started spray painting. I also had to plug up the pipe in the uphill bottom corner so that the water could drain out completely. I did that with a carved wooden plug and silicone caulk. I patched the hole in the back of the panel with a piece of isocyanurate foam and then put it back together - at least I started, 'til I ran out of silicon caulk.
Starting to open up a solar panel
 |
the back of the collector plate is showing with the pipes and the hole in the bottom of the box to the right.
 |
The hole in the back of the panel and the piece to patch it
 |
putting the solar panel back together
 |
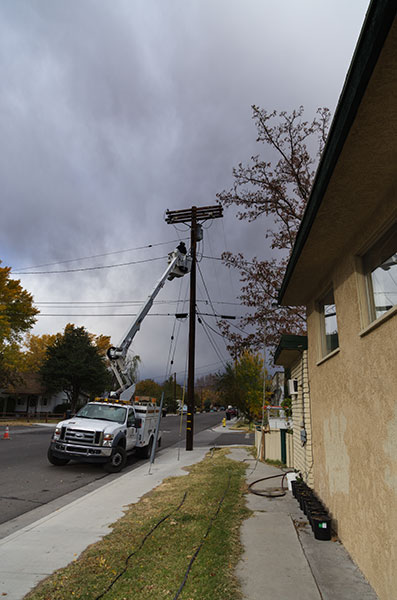
Meanwhile, the electrician wired in all the switches and lights and then the DWP cut down my old wires and put in new ones so I am going from 100 amp service to 200 amp service. I got a peek at the roof composition where they ran the conduit through it. Not a lot of insulation, but it is pretty solid. Unfortunately they didn't have a residential meter and despite telling me they were coming today and thus keeping me home all day they didn't come.
DWP cutting down the old electric connection - note no mountains are visible
 |
roof composition - asphalt shingles, some sort of fiberboard, and wood.
 |
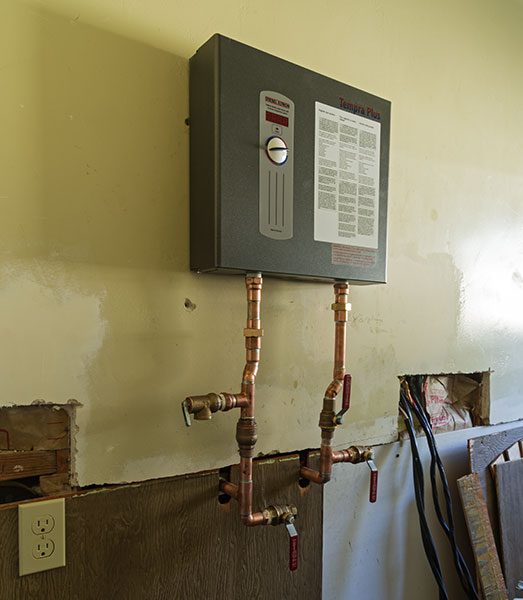
Finally the counters came, which meant the sink could get wired in, and while the plumbers were here they hooked up the hot water heater (but it isn't connected to the electricity yet, so I still have no hot water)
counters are in - plus halogen under counter lights
 |
sink and faucet. I have the hookups for a dishwasher, but won't get one now.
 |
hot water on demand heater hooked up
 |
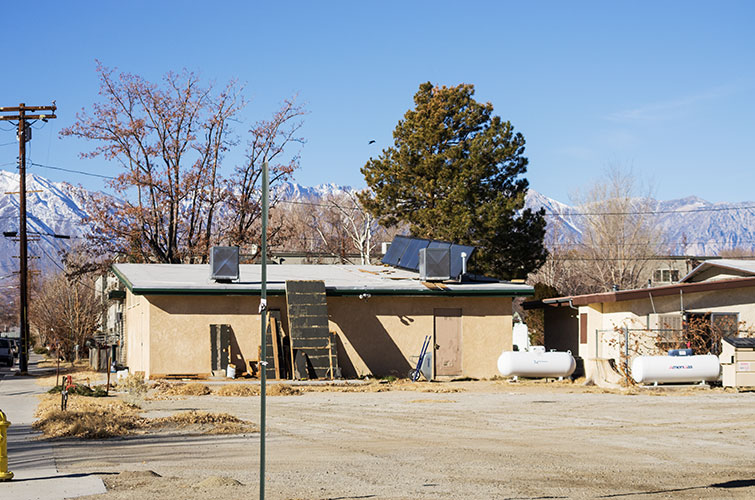
sometimes amid all this work it is good to remind myself why I want to live here - from the front yard
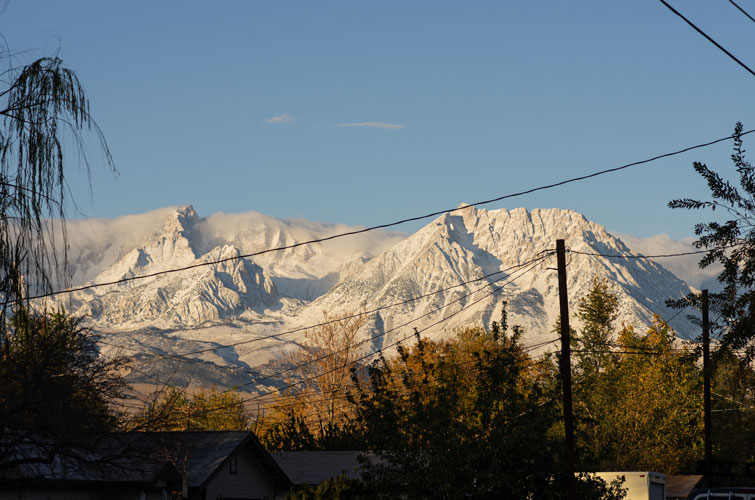 |
11/22/13 There has been more progress. The hot water heater got wired up, so I now have hot water. This is just in time since the solar shower wasn't always satisfactory anymore. The stove got delivered, and then later hooked up - so I can cook on a "real" stove complete with an oven. I painted most of the bathroom white. I bought a refrigerator. I am getting soft, but not that soft, because the heat isn't working yet. The refrigerator is less necessary now that it is cold at night, but it sure is convenient, and I managed to find an energy star one, so it is fairly efficient.
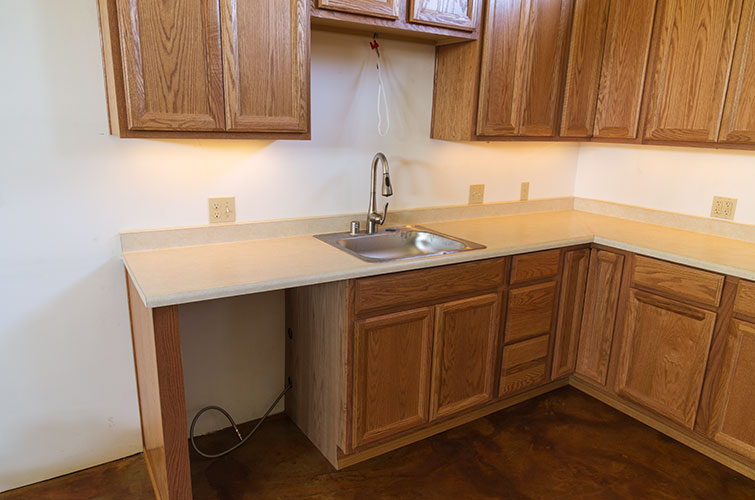
Kitchen sink with LED light and LED strip lights under the counter (since re-wired to run off a wall switch)
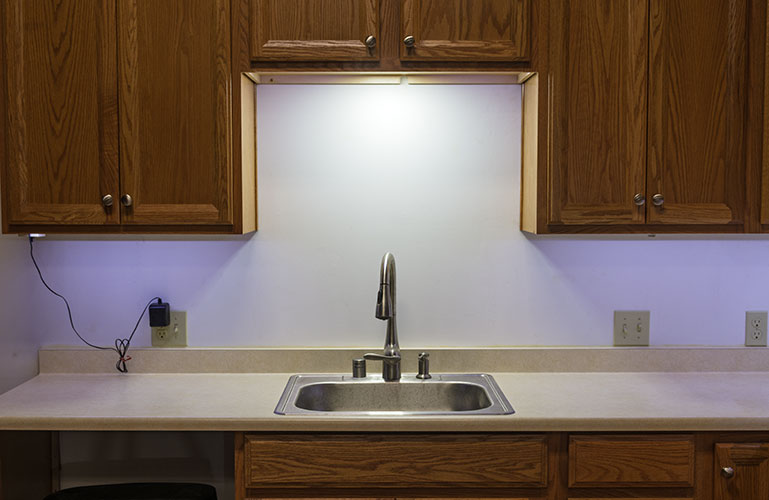 |
it almost looks like a real kitchen
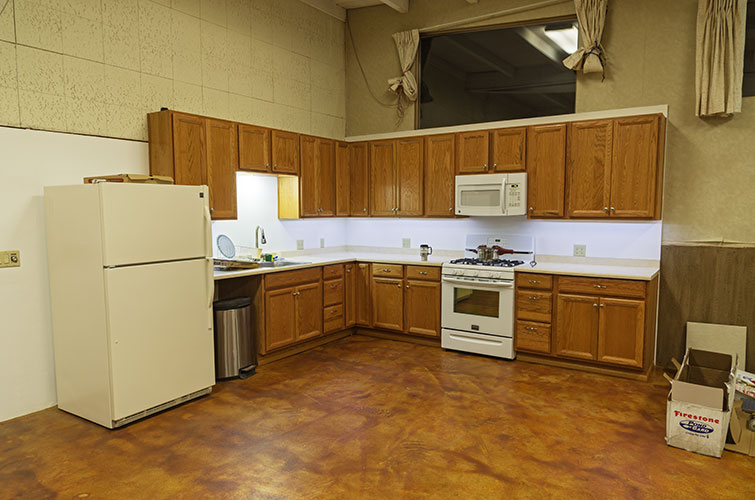 |
the bathroom has very white walls
 |
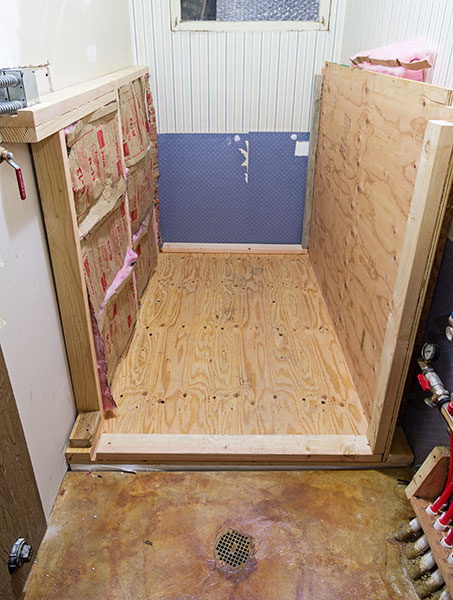
Lately I have been working on the solar. I have rehabbed 3 of the 4 panels and started building my water tank. It is pretty solid with lots of glued and screwed joints. The sides are all 3/4 inch plywood pushing out against 2x4s glued and screwed to the bottom. There are 2 layers of 2X4 around the top with some vertical supports too. The long sides extend past the short ends so that more 2X4s can be fastened to them to support the short sides. It is basically a very solid wood box lined with polyiso foam with a pond liner folded inside that. The whole thing is sitting on 4 inches of styrofoam and I put fiberglass insulation between it and the surrounding walls (which are also insulated). hopefully it will hold the hot water effectively and not leak a lot of heat into the interior - especially not in the summer.
tank under construction showing insulation and vertical supports
 |
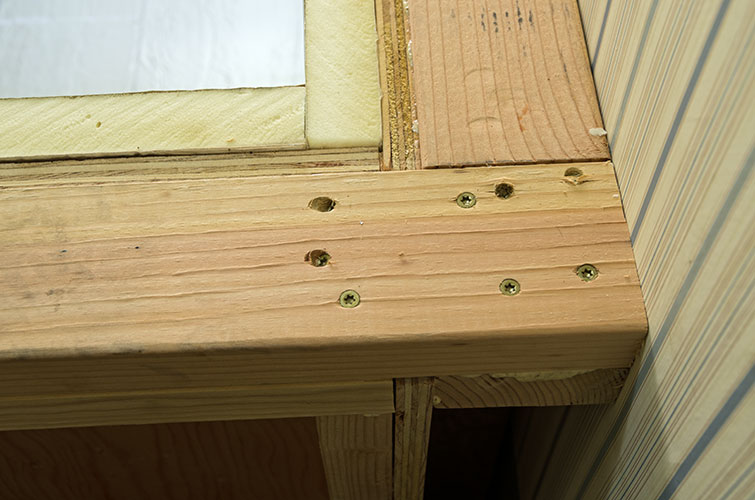
the tank with 3 sides in place. It needs the front plywood and the top side 2X4s
 |
one tank corner with the 1.5 inch insulation in place. It still needs a reinforcing plate
 |
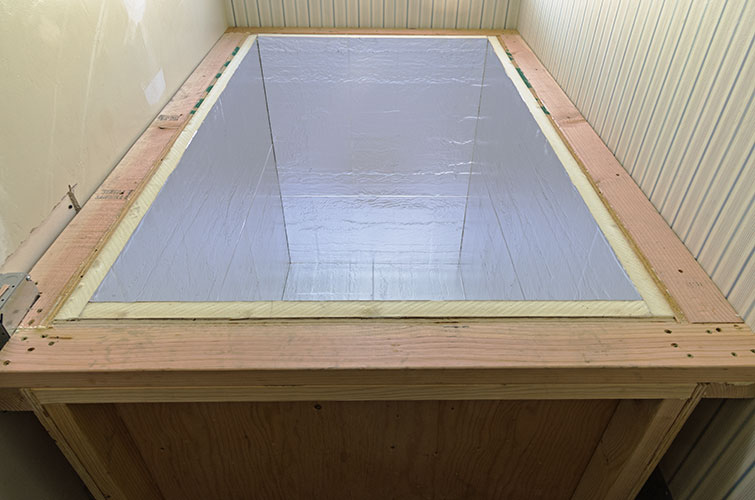
tank with insulation
 |
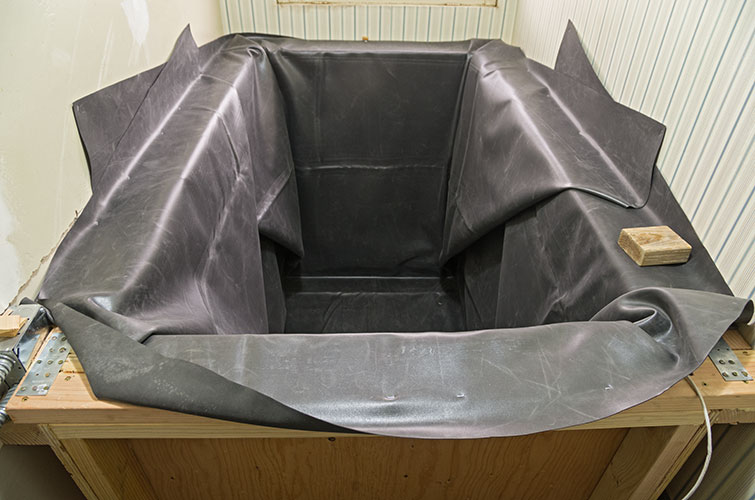
tank with pond liner and corner plates
 |
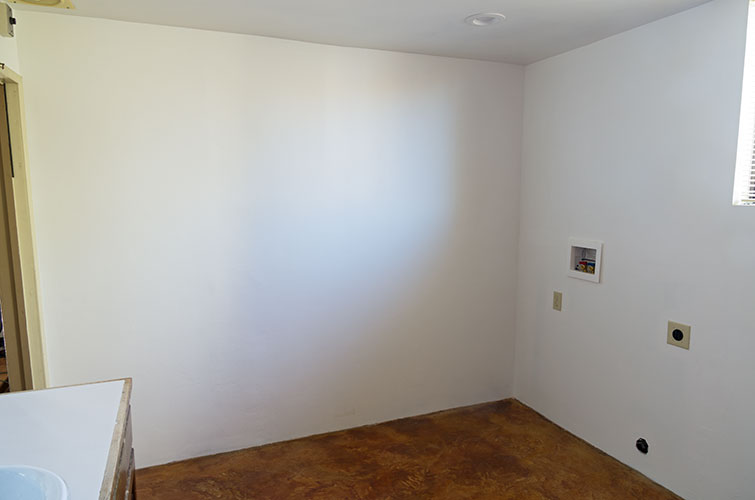
I also made a run down to the Ridgecrest Home Depot to pick up stuff for solar panel mounting plus the pipe insulation. Today I learned that I need to move the water heater power junction box up (I wish I had done that before I started on the tank) and that I will have to put that circuit on a GFCI breaker - more expense, but hopefully not that hard to do. I also need baseboard in the bathroom and to finish and seal and paint inside the tub enclosure. There is plenty to keep me busy - it feels like slogging up an endless loose sandy slope sometimes but at least I can pull leftovers out of the fridge and microwave them and take a shower now.
To help spur my motivation to get the solar heat working, it snowed today. I guess I wouldn't get much heat from solar on a day like this anyway though.
fresh snow - I won't be spray painting outside today
 |
12/26/13 I have been busy, and some of it has been productive. I put a trex rim on the tank (except the front where the pipes will run). I did some more finish work in the bathroom (baseboard, etc). I finished refurbishing the solar panels and put them all back together. I also spent ages trying to sweat (solder) the connections for solar panel hookup. It was very frustrating as I had a lot of trouble getting the solder to stick to the metal and wick into the joint.
motivation is high to get the solar operational
 |
bathroom - 1 step closer
 |
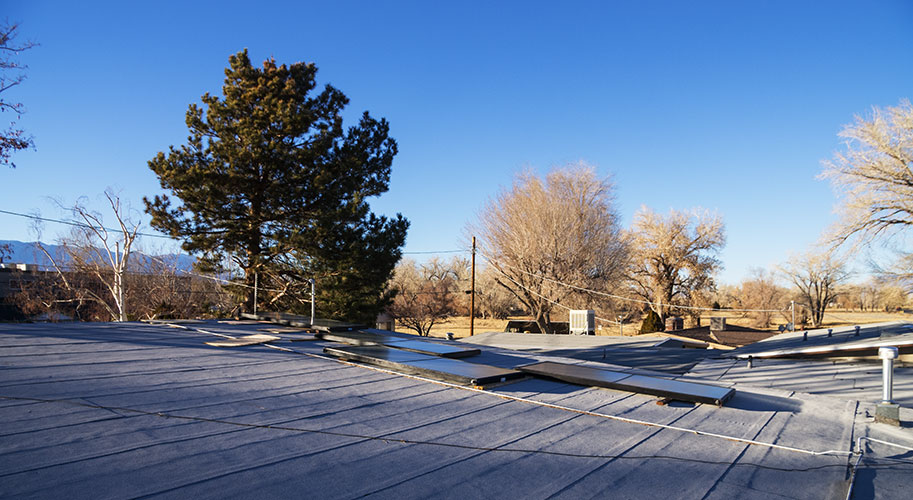
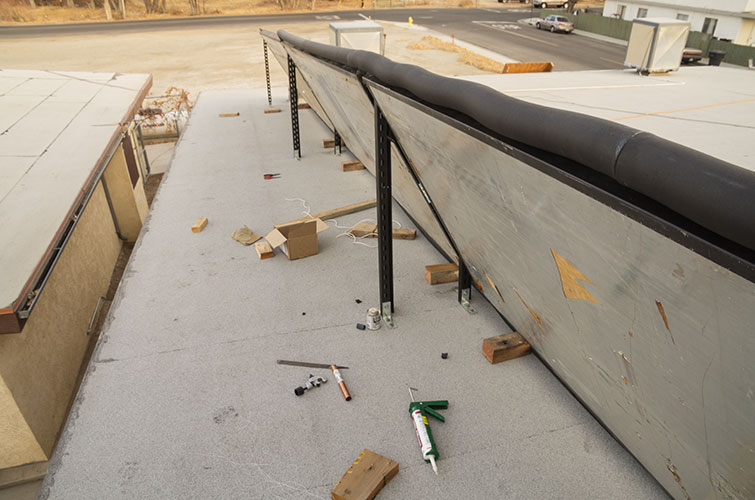
Finally I got some decent weather and moved the solar panels up onto the roof with the help of 2 neighbors - thanks guys - there is no way I could have done that by myself. Then I set about mounting them up at 60 degrees. This is to maximize the gain in the winter. I'll get more than enough heat in the summer. This was a little awkward with 4x10 ft panels and one person but with clever bracing and some luck I managed. Then I started plumbing them in. It was fairly windy and I used a box as a windbreak for sweating but I still couldn't get the solder to melt even with mapp gas. The next morning I went out and bought a new torch with swirling action. WOW, what a difference that made. I connected everything together until my pex cinch tool broke (after 9 cinches). The next morning I called all of the local places that might have one and went to the 2 that said they did - but they didn't. So I ordered one online w/ 2 day delivery. Meanwhile I worked on the pump connections. When the tool came I wrestled the pex in place and hooked everything up and ran water up through the system with a hose.
panels on the roof - a huge step. I'd love a deck up here.
 |
The first of the support struts in place - note moonrise
 |
Panels up (and plumbed in in this pic)
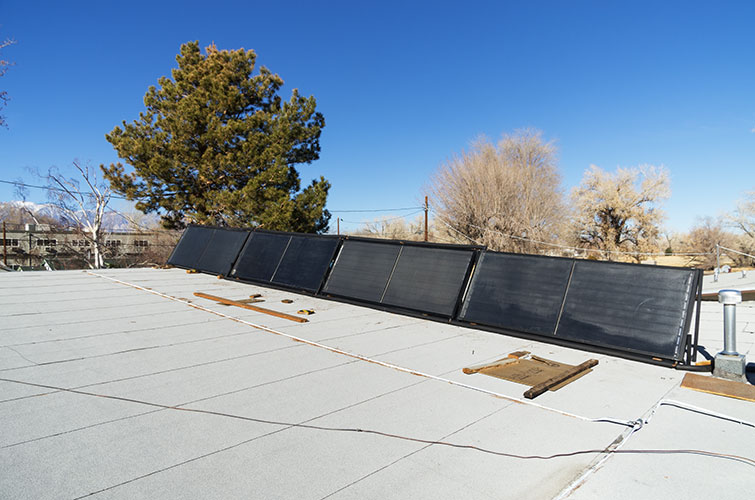 |
Panels up showing the mounting struts. The pipe on the top is the return line.
 |
It leaked, badly, all over. Actually I don't think every joint leaked, but it was hard to tell when water was pouring onto them from above. sigh. Most frustrating were the 2 plugs inside the panels that I could see were leaking, so I took the glass off those panels and made new plugs and caulked those in with a lot more caulk and care. That night I thought about the sweating process and did more research online. The next morning I went to get some pressure testing stuff and on a quest for tinning flux. I found some at one of the stores that said they had a pex cinch tool. It was a big container, but I went for it. Oh my - with the new flux and new torch it was like a completely different process - I could actually do it most of the time. So I spent a day taking things apart, re-sweating them, and then putting them back together. Then I ran some more water through things - one of the plugs leaked and a few of the other joints, but they were more drips and trickles instead of gushers. So I redid the plug and closed up the panel with the fixed plug. The next day I spent the morning re-doing the leaking connections (this required cutting off the pex cinch clamps and melting the solder to take the connections apart and then cleaning everything off and refluxing (with the magic flux) and re-soldering. In the afternoon I ran more water through it and saw another one of the plugs leaked - I couldn't see this before because of another leak. So that panel glass came off and I re-did that plug. The next morning it was back at the leaks in the pipe connections and then in the afternoon I ran the water again - hallelujah - no leaks. Meanwhile in the evenings I had been messing with the pump connections for the floor manifold - that leaked like mad too. So I had to re-do those. Plus take out the valves on either side of the pump because I had destroyed them by overheating because the torch heat things so slowly the heat had time to cook the seals. While I was messing with that I also flushed the hydronic floor lines and discovered the manifold was shipped with the valves closed.
Christmas day I ran the water through the panel for a while - I suspected an air leak in the upper soldered connections because there was air in the line and those joints had leaked a bit under hose pressure. Still I was running cold water into the panel and getting hot water out. The next day I re-sweated those top joints and then the return line was a lot quieter and maintained siphon so the flow rate tripled. I also ran the water through the floor slowly heating up my 8 inches of concrete. Yesterday I hooked up the pump controller to the solar pump and it came on this morning automatically and shut off in the evening. I think I need to change it to shut off a few degrees earlier, but otherwise it worked well.
panels up on top from the east. note the ramp of old stage boards to help get the panels up.
 |
the return line comes into the wall above the kitchen and then back to the tank room.
 |
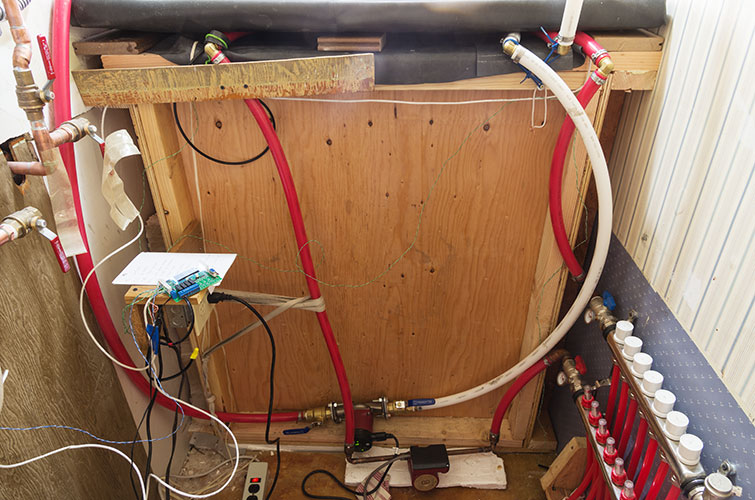
pumps, manifold, lines, and controller in the tank room. The back pump with blue valve handles runs to the solar panels, the other one pumps to the floor. the copper pipes to the left go into the hot water heater.
 |
1/06/14 I have been running the solar panels for a while. The temperature has slowly risen inside and the floor is no longer icy in most places. I also set up the heat exchange coil and the tie in to the domestic hot water - complete with tempering valve in the hopes that the water will be hot enough to require it. The tank has gotten up to the 90s during the most recent sunny day. The weather has been pretty warm lately too, so that could be contributing to the warming inside.
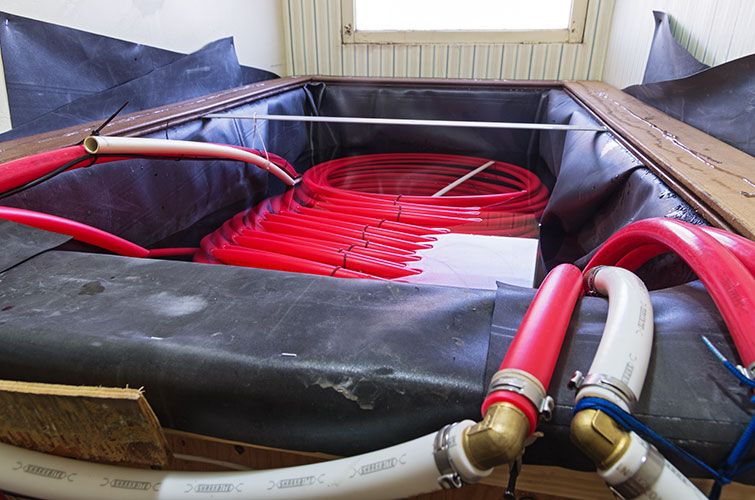
view into the tank with the lid off. The pipe in the left with another pipe fastened to it to straighten it a bit is the floor intake, under that is the cold water into the heat exchange coil, the other end of that turns from red to white at an elbow (thanks Joan), then the white-white elbow is the intake to the panels, the next 2 are the return from the floor and the return from the panels.
 |
In the 24 hour data graph below the difference between the E and W panels in the afternoon is because the W side gets partly shaded by the locust tree. The spike near the end of the day is when the pump shut down for a bit possibly because of a cloud. The solar panel pump runs while the panels are hotter than the tank bottom. In the middle of the day the return water is about 10 degrees warmer than the supply water although there is some loss on the way up to the panels. The floor pump runs when the floor intake is 7 or so degrees warmer than the kitchen floor measurement (which stays between 59 and 63). It runs from pretty much when the solar panels start delivering heat 'til 8:30 or so. I want to set it up to run again in the early morning, but I'll need to run some more wires to get that to work the way I want it to.The panel temperatures are actually cooler than the air temp because they radiate heat into the sky at night and the outside air temp sensor is just sort of hanging below the top of a panel so it is somewhat insulated by the panel and gets a little heat from the roof. The tank top temperature drops when the pumps come on because the water is stirred a bit, still it remains above the bottom temp, so some stratification remains. The other drop in the tank top temp around 19:00 is when I took a shower so 50 degree water was running into the heat exchanger. The absolute values of these thermistors might not be exact, but the relative data from each individual one is probably pretty good and they should be within a few degrees of correct.
24 hours of data.
 |
Today I heard a leak in one panel (it was sucking in a stream of bubbles which were also visible in the return pipe). So I opened things up and made a different plug for that pipe - this is the only one I hadn't redone, so I suppose it was time. Hopefully it isn't a harbinger of the others all going to fail in the future.
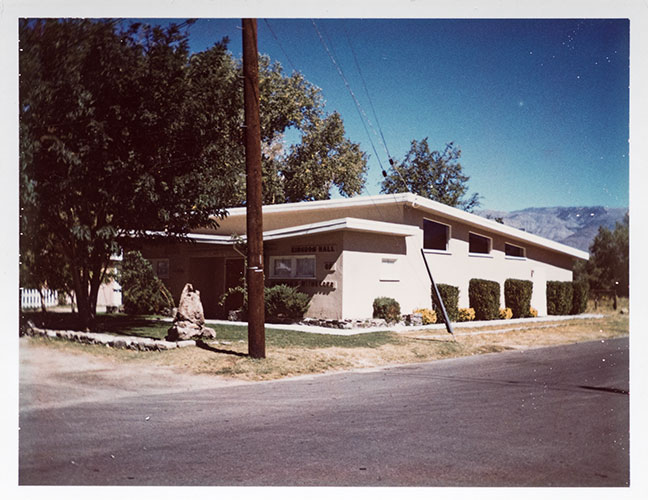
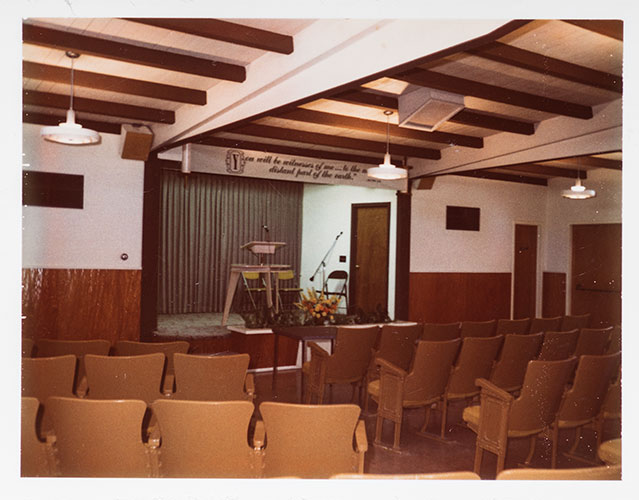
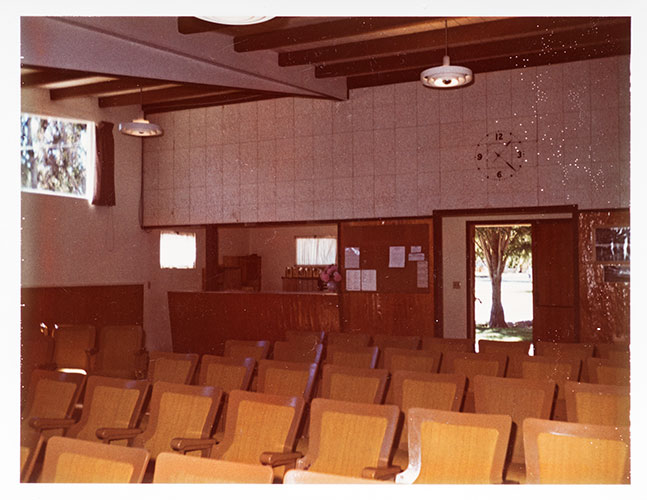
One other fun thing is I got some little (3 inches by 4 inches) photos from one of the guys who went here when it was a Jehovah's Witness hall. I think they are from the 60s or early 70s. These are from before the bricks inside and the office was different as well as before the women's bathroom was extended.
view from the southwest
 |
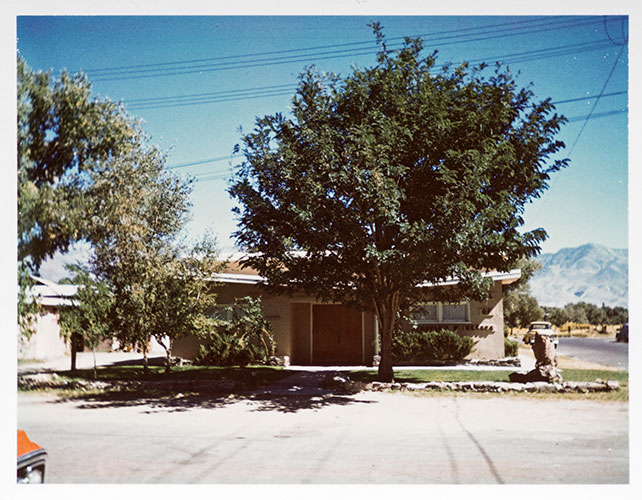
view from the west
 |
interior facing east towards the stage
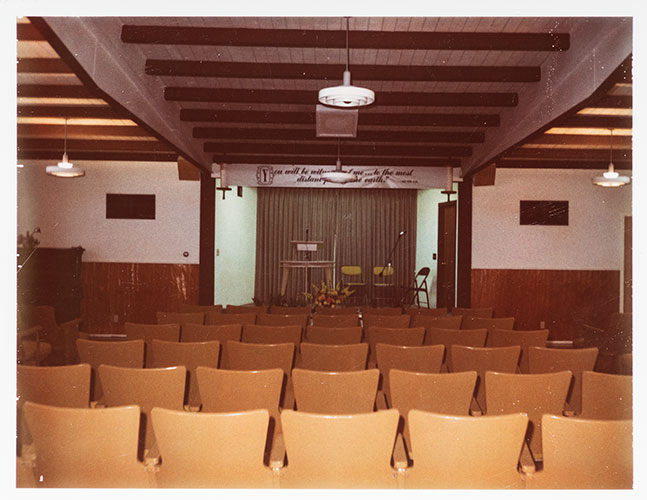 |
interior facing southeast towards the stage
 |
interior facing southwest towards the office and front door
 |
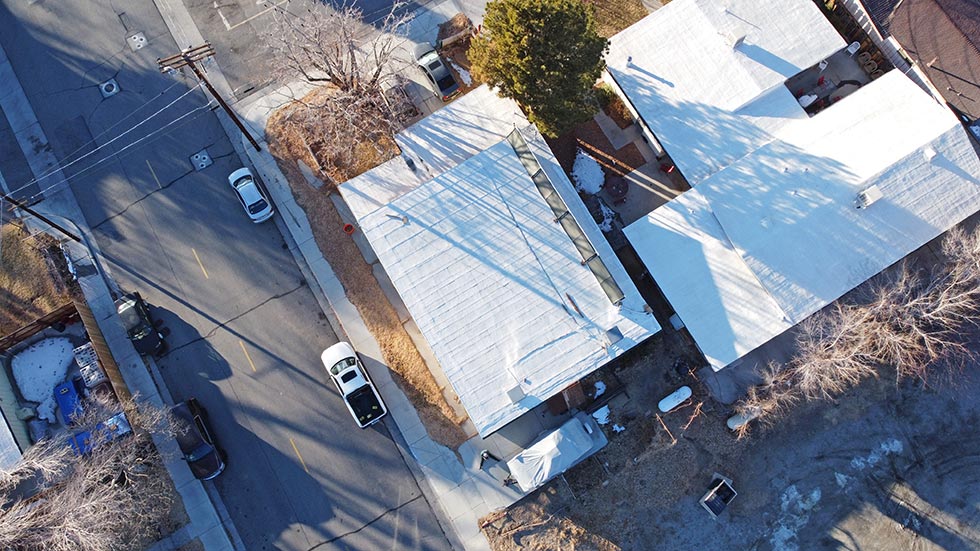
2021 update - not a lot has changed the last few years other than Iris living here once she was able to telework. In my absence one winter a solar panel glass broke (kids throwing rocks?), and I have had a few little leaks in the panels - mostly that means the holes suck air in. Some of the sensors in the panel went bad (I think the wire insulation melted)- which was a problem if it was a sensor that controlled the pumps. Otherwise I have had essentially infinite hot water for 8 or 9 months of the year and semi to fully hot water the rest of the time and I haven't run my propane heater since 2013. Sometimes it is colder inside that would be optimal though. In 2019 I painted over the roof with a sealer and a white layer (Ames elasto-barrier and max-stretch). That seemed to help keep things a little cooler in the summer - and maybe a little cooler in the winter, although maybe the solar gets a little more from the reflection too. I have upped the garden game a bit too, with 2 semi raised beds on the east side and a few fig plants.
Feb 2021 aerial photo, note white roof. North is to the upper right.
 |
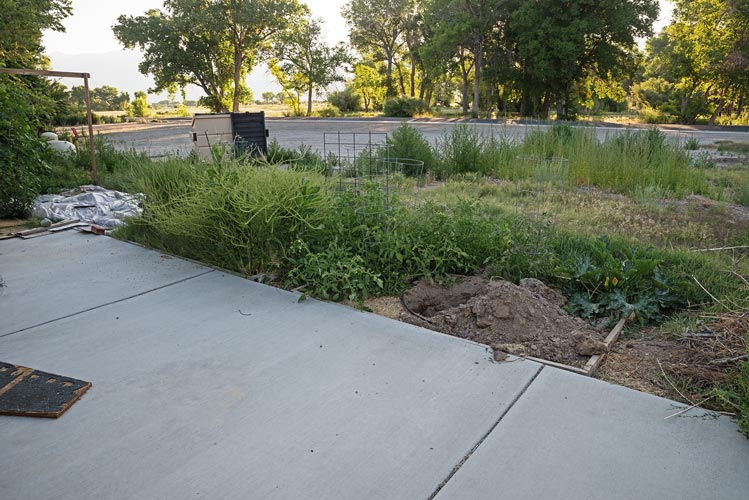
2024 February update: I added a few more garden beds in 2023 and had very good harvests of tomatoes, zucchini and yellow crook-neck squash, grapes, and figs. I sometimes had good swiss chard production, but sometimes the deer ate them. I had some production of kale, green onions, green beans, basil, and cilantro. I also tried to cover up one bed to kill the grass invading it. I also emptied the compost in Jan 2024 and put pavers under it and started filling it again. Hopefully this prevents the skunks from trying to dig in and settling it into the ground. I have lots of rocks around it for that reason too.
3 of the garden beds June 30, 2023
leftmost is covered in plastic, center is bolting chard chaos, right is a new one with tomatoes and squash
this is before they really got going
 |
Iris sorting tomatoes harvested before the first frost
Oct 30, 2023
 |
The bigger news is I finally got solar photovoltaic panels on the roof and operating. I tried for quite a while to figure out how to install them myself but ran into the buzz saw of the permitting process, hardware that was only sold to certified installers, a non-standard roof, and California specific rules. After butting my head against that for a while I got some professional estimates - way too expensive, but I went with it anyway. 3 months later they were installed (when I was not here) and then almost 2 months later I got the permission to operate from LADWP and am producing electricity as well as hot water. I have an 8 panel 2.92 kW (dc) grid - tied microinverter system with no batteries. Someday I'll probably get some batteries. Fortunately LADWP still has reasonable net metering unlike PGE, SCE, and SDGE which have net metering rules that pretty much have killed the residential solar installation economy, maybe once batteries get cheaper or they jack up the electricity rates high enough it will come back. I'll have more to say about the economics once I start getting the electric bills, but I am guessing it wasn't a particularly wise economic move, but I like generating solar electricity and I can use it with semi-impunity now, I plan on doing a lot more electric cooking and also using spot electric heating if things get too cold inside. In the last week I have generated more than I have used, so I imagine in June I'll be harvesting way way more than I use, or I'll just start taking electricity for granted like it comes from the sun and use up all the excess.
old solar hot water panels in the back and new photovoltaic panels in the middle
taken facing NNW
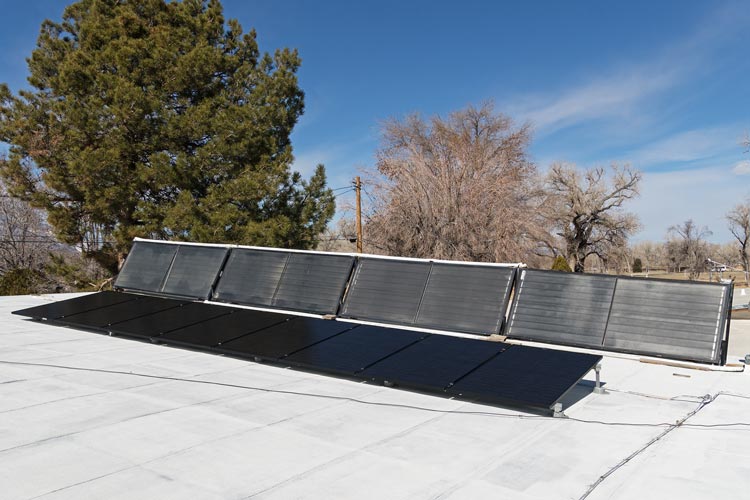 |
I'd have probably tilted the panels up a little steeper - at least ~30 degrees. I also would have tried to make them so I could adjust them a few times a year. One possible advantage of the lower angle is that they might generate more power on a cloudy day - which is when I make the least and the flatter tilt will optimize summer production when the days are longer and more sunny. I don't think this makes much difference as long as I am grid tied with net metering but it could be helpful if I was off-grid with a battery bank. The solar water panels are tilted up at 60 degrees (plus the tilt to the E from the roof) This increases the gain in the middle of the winter when I need it most, in the summer I have all the hot water I can use. I also don't really get anything on a heavily cloudy day from the solar hot water. I'm still figuring out how well the system works and doesn't. I am very disappointed in the Enphase Enlighten monitoring - it tells me most of what I'd like to know, but it could be so much more user friendly and informative with a few changes. I think there might be a way to read the raw output and make sense of that data, but I haven't figured that out yet.
When a strong winter storm came in in February 2024 I was able to see how well the system produced on a very cloudy day - pretty poorly, with only 1 kWh reported, probably not enough to supply all my usage for the day, especially if I use electricity for anything other than running the fridge and freezer. I guess that means I would need a battery big enough to go for more than one night if I wanted to be completely off grid, or prepare for doing without when the production is the worst. A few days later I had a day with nearly full sun - and produced 14kWh, more than enough for my current daily uses, in fact even on a normal cloudy day I probably generate enough for average use - at least before I got the panels and started using more electricity.
production on a nearly fully sunny day and a partly cloudy day.
Note on the cloudy day I actually generated more in the late afternoon as the tree shades the panels.
The vertical axis on the graph is kWh generated per 15 min period.
 |
No material on this page may be copied or used without permission.